Getting Back Into 3D Printing
Meet my Monoprice MP Select Mini V1:
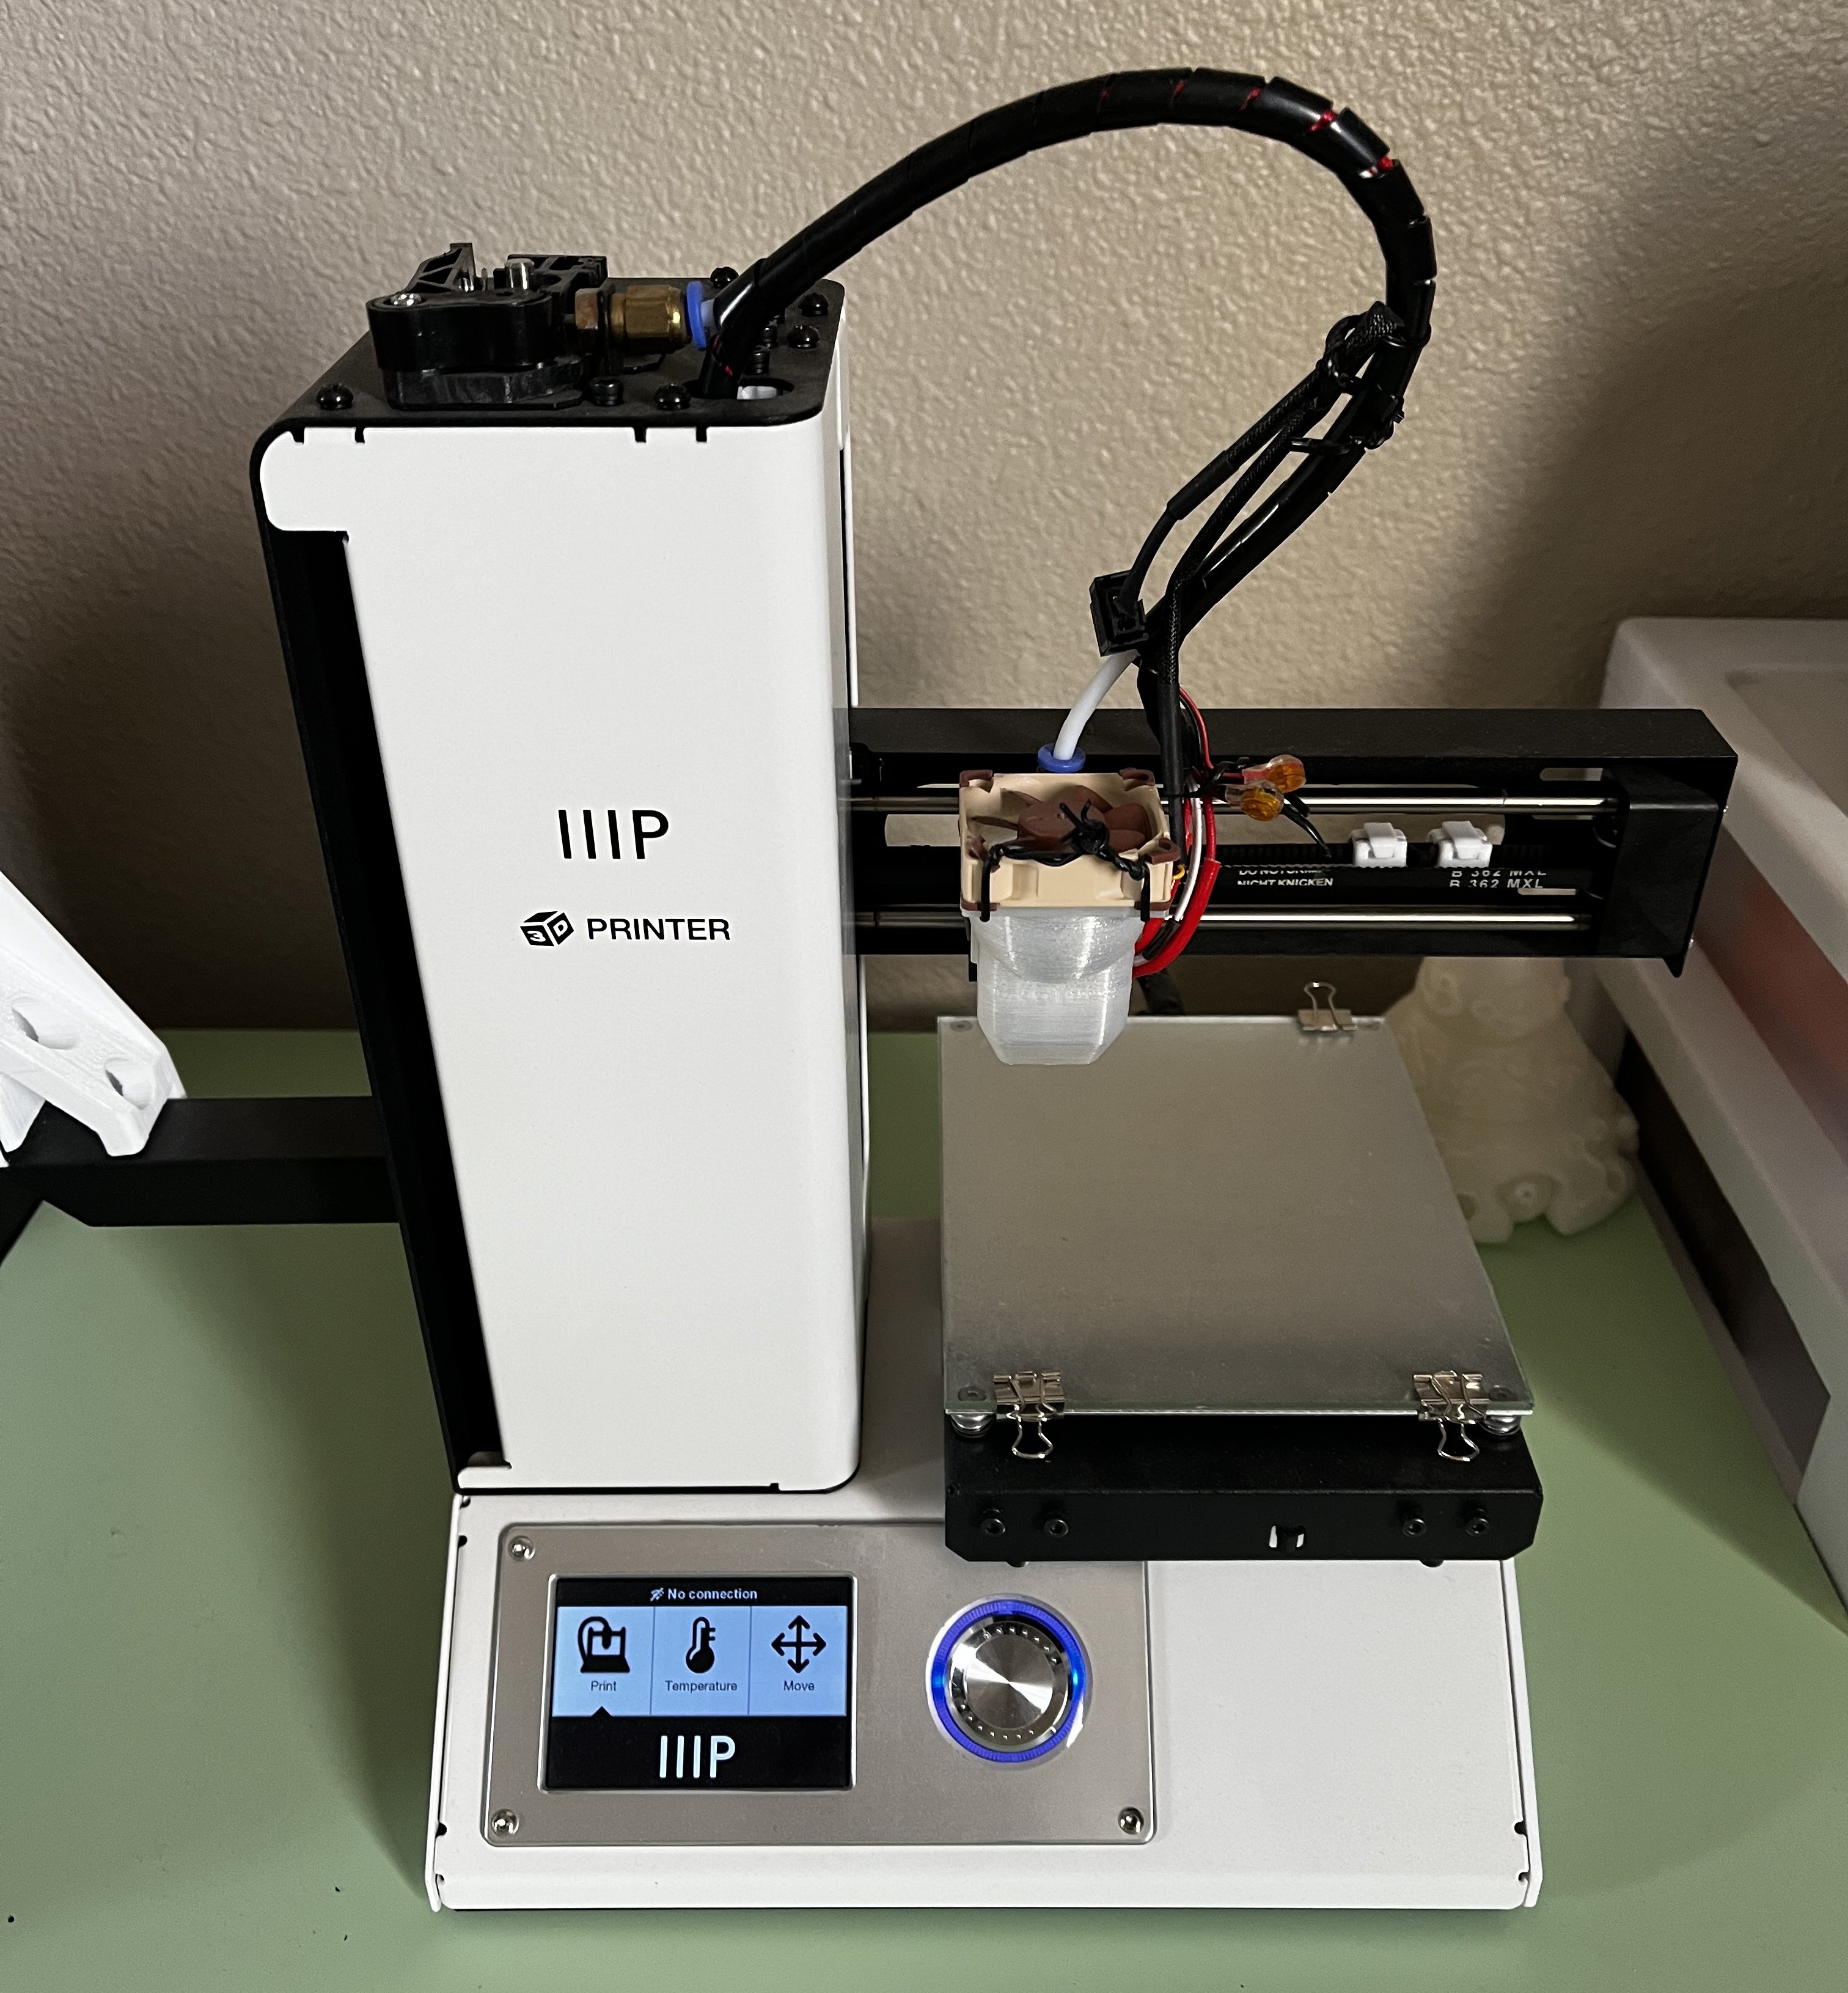
I purchased this little guy in 2016 which honestly doesn't seem like that long ago, but 3D printing has come a long way since then. Don't let its size fool you, the Mini is a capable printer. It served me well for many prints, but it is very much a no-frills "this is my first 3D printer" model. The fanciest feature it has is the heated bed, which at time of purchase was not guaranteed but nowadays you just don't see any printers without it.
For many years it delivered quite well quality-wise. I gave it a couple upgrades:
- a glass bed
- a noctua super-quiet cooling fan
- re-routed the wiring to the heated bed because it was getting pinched and severed
- an upgraded 3D printed side panel with ventilation slits
However, after a couple moves and a decent amount of neglect the print quality and ease-of-use just wasn't there anymore. After a couple attempts to clean and lubricate it and restore its previous semblance of quality, the inconvenience of working with it just wasn't worth it to me anymore. Probably my largest gripe is that it has an extremely finnicky bowden tube setup, and it doesn't feed very well directly into the extruder. Every time my filament broke inside of it or I needed to reload it to start a new print, the process was extremely tedious as it would get caught at multiple points along the way and I'd have to unscrew multiple things to push the filament through all the way.
History became legend... legend became myth... for a long time I allowed the printer to just sit and before I knew it what I once considered a hobby gradually lost steam.
The Spark
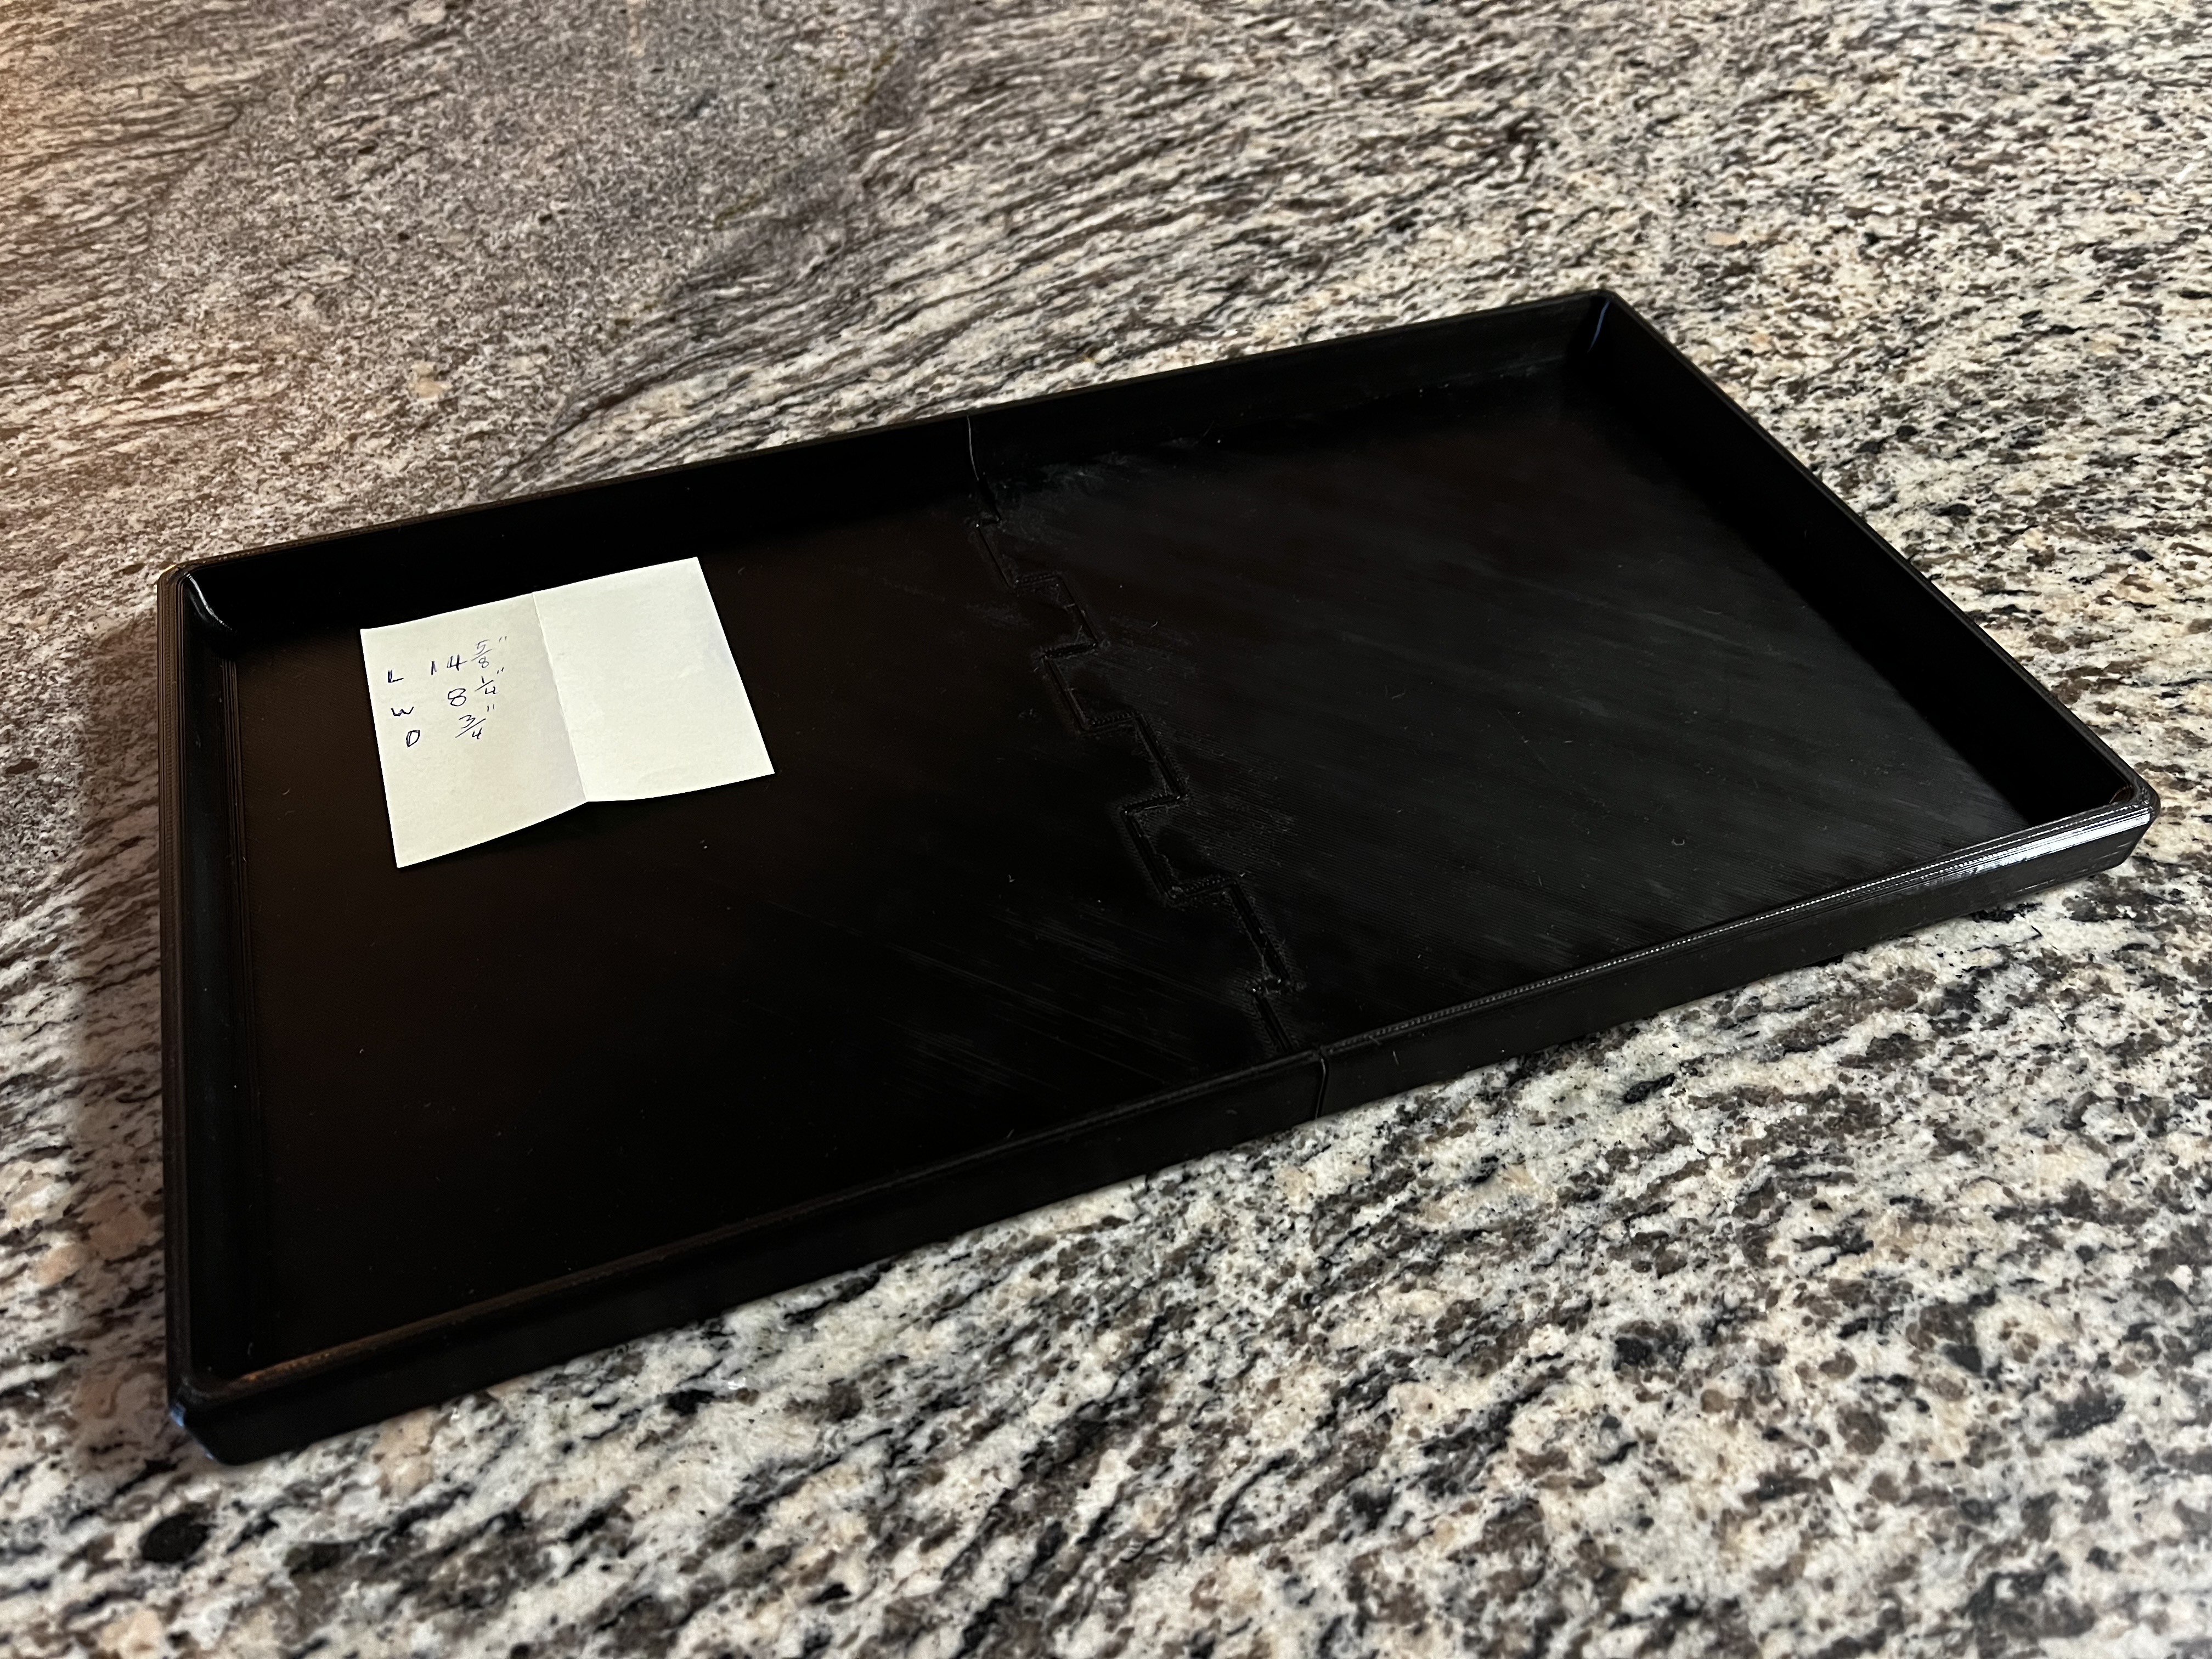
Earlier this year we visited my grandparents and my grandpa had a 3D printing request for me: a very specifically sized tray (14 5/8" x 8 1/4" x 3/4" for those curious) for his side table. My brain was thinking exactly zero things about 3D printing at that moment but that one conversation got the gears turning. Maybe it was time for an upgrade? What printer could I get that would be able to print something that big? What upgrades should I look for from recent years?
The seed had been planted, and I got to researching.
My general requirements were as follows:
- Direct drive extruder: Aside from just seeming like a better way to extrude filament, I was tired of dealing with my bowden tube setup and wanted the more convenient loading process a direct drive extruder provides.
- Automatic bed leveling: Compensates for the slight curvature of the build surface to place a consistent first layer.
- Larger build volume: My Monoprice's build volume of 120mm³ was occasionally restrictive, so I wanted 200mm³ minimum.
- Removable/Magnetic build plate: I enjoyed the glass build plate I put on the Monoprice, but many printers nowadays have removable steel build plates with a special coating for ease of printing and removal.
- Quiet(er): No printer is going to be perfectly silent, but at least a little quieter than Monoprice would be a step up.
- Adjustment Knobs: Knobs for belt tensioning and bed leveling would be a massive quality of life improvement, previously I had to remove the glass plate and adjust the bed leveling via screws.
Selecting a New Printer
I got to researching and eventually settled on a couple options:
- Prusa i3 MK3S+
- Ender 3 S1
- Ender 3 S1 Pro
Of the three, the Prusa was the most enticing but I wasn't sure I was ready to spend almost $1000 on a printer. As far as features, customer support, and street cred goes it led the pack by a long shot.
I also looked at the Ender 3 S1. It had a lot of the features I wanted from my list above and looked pretty nice with favorable reviews, at an affordable price.
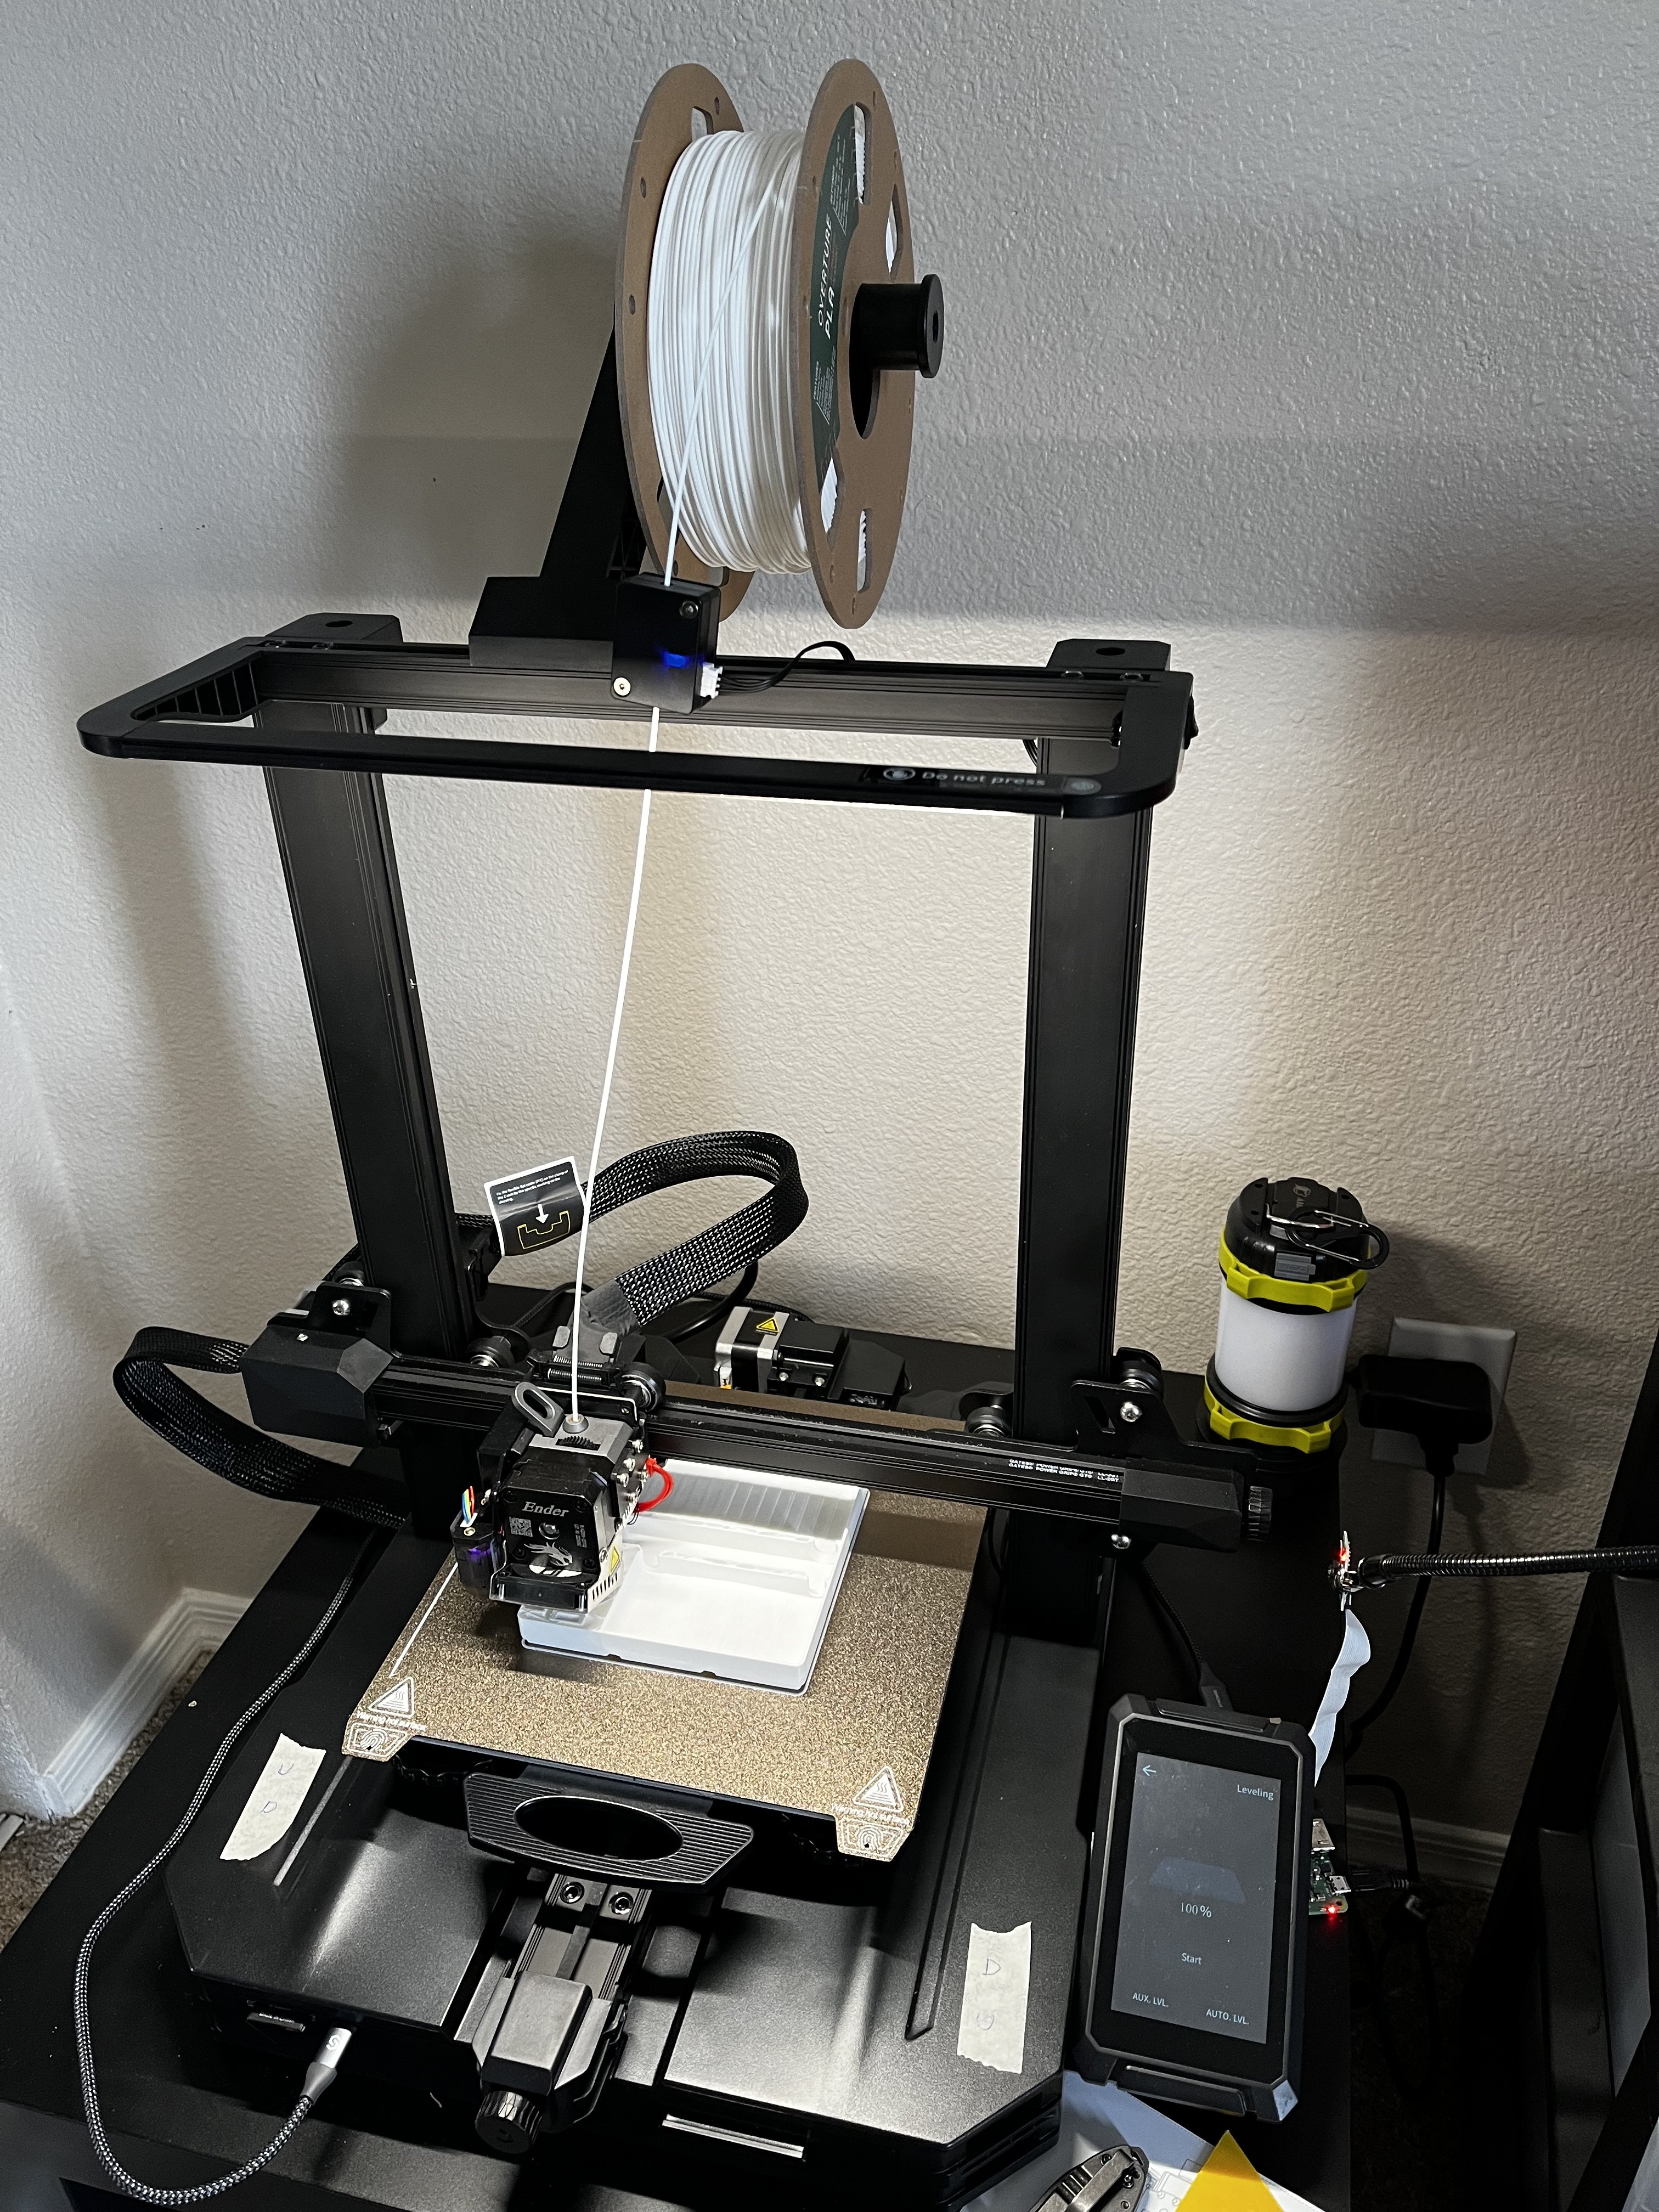
Ultimately I settled on the Ender 3 S1 Pro. It's not all that different from the Ender 3 S1, but there are a couple differences. It has a PEI build sheet (instead of PC or Polycarbonate), it has a touchscreen interface instead of a scroll wheel (honestly kind of a step down), and perhaps most importantly it had an LED light strip at the top that could be switched on and off 🙂 It also had the ability to print at higher temperatures. In retrospect it probably wasn't worth the $80 upgrade, but the light did come in handy a lot and I enjoyed printing on the PEI build sheet. Plus, I was able to get at closer to the regular S1's price from an Amazon lightning deal so the extra cost didn't matter that much anyway!
After a few hours of assembly we were ready to rock:
Projects
Tests
I started off with a handful of 3D models that a lot of people with new printers start with to get everything dialed in.
- Rabbit: This was just included on the printer's SD card so I tried it first :)
- Calibration Cube: A simple, small cube that can help identify problems. You can also measure it after printing to check dimensional accuracy.
- Benchy: A little boat that's the gold standard benchmark to check print quality and basic overhangs.
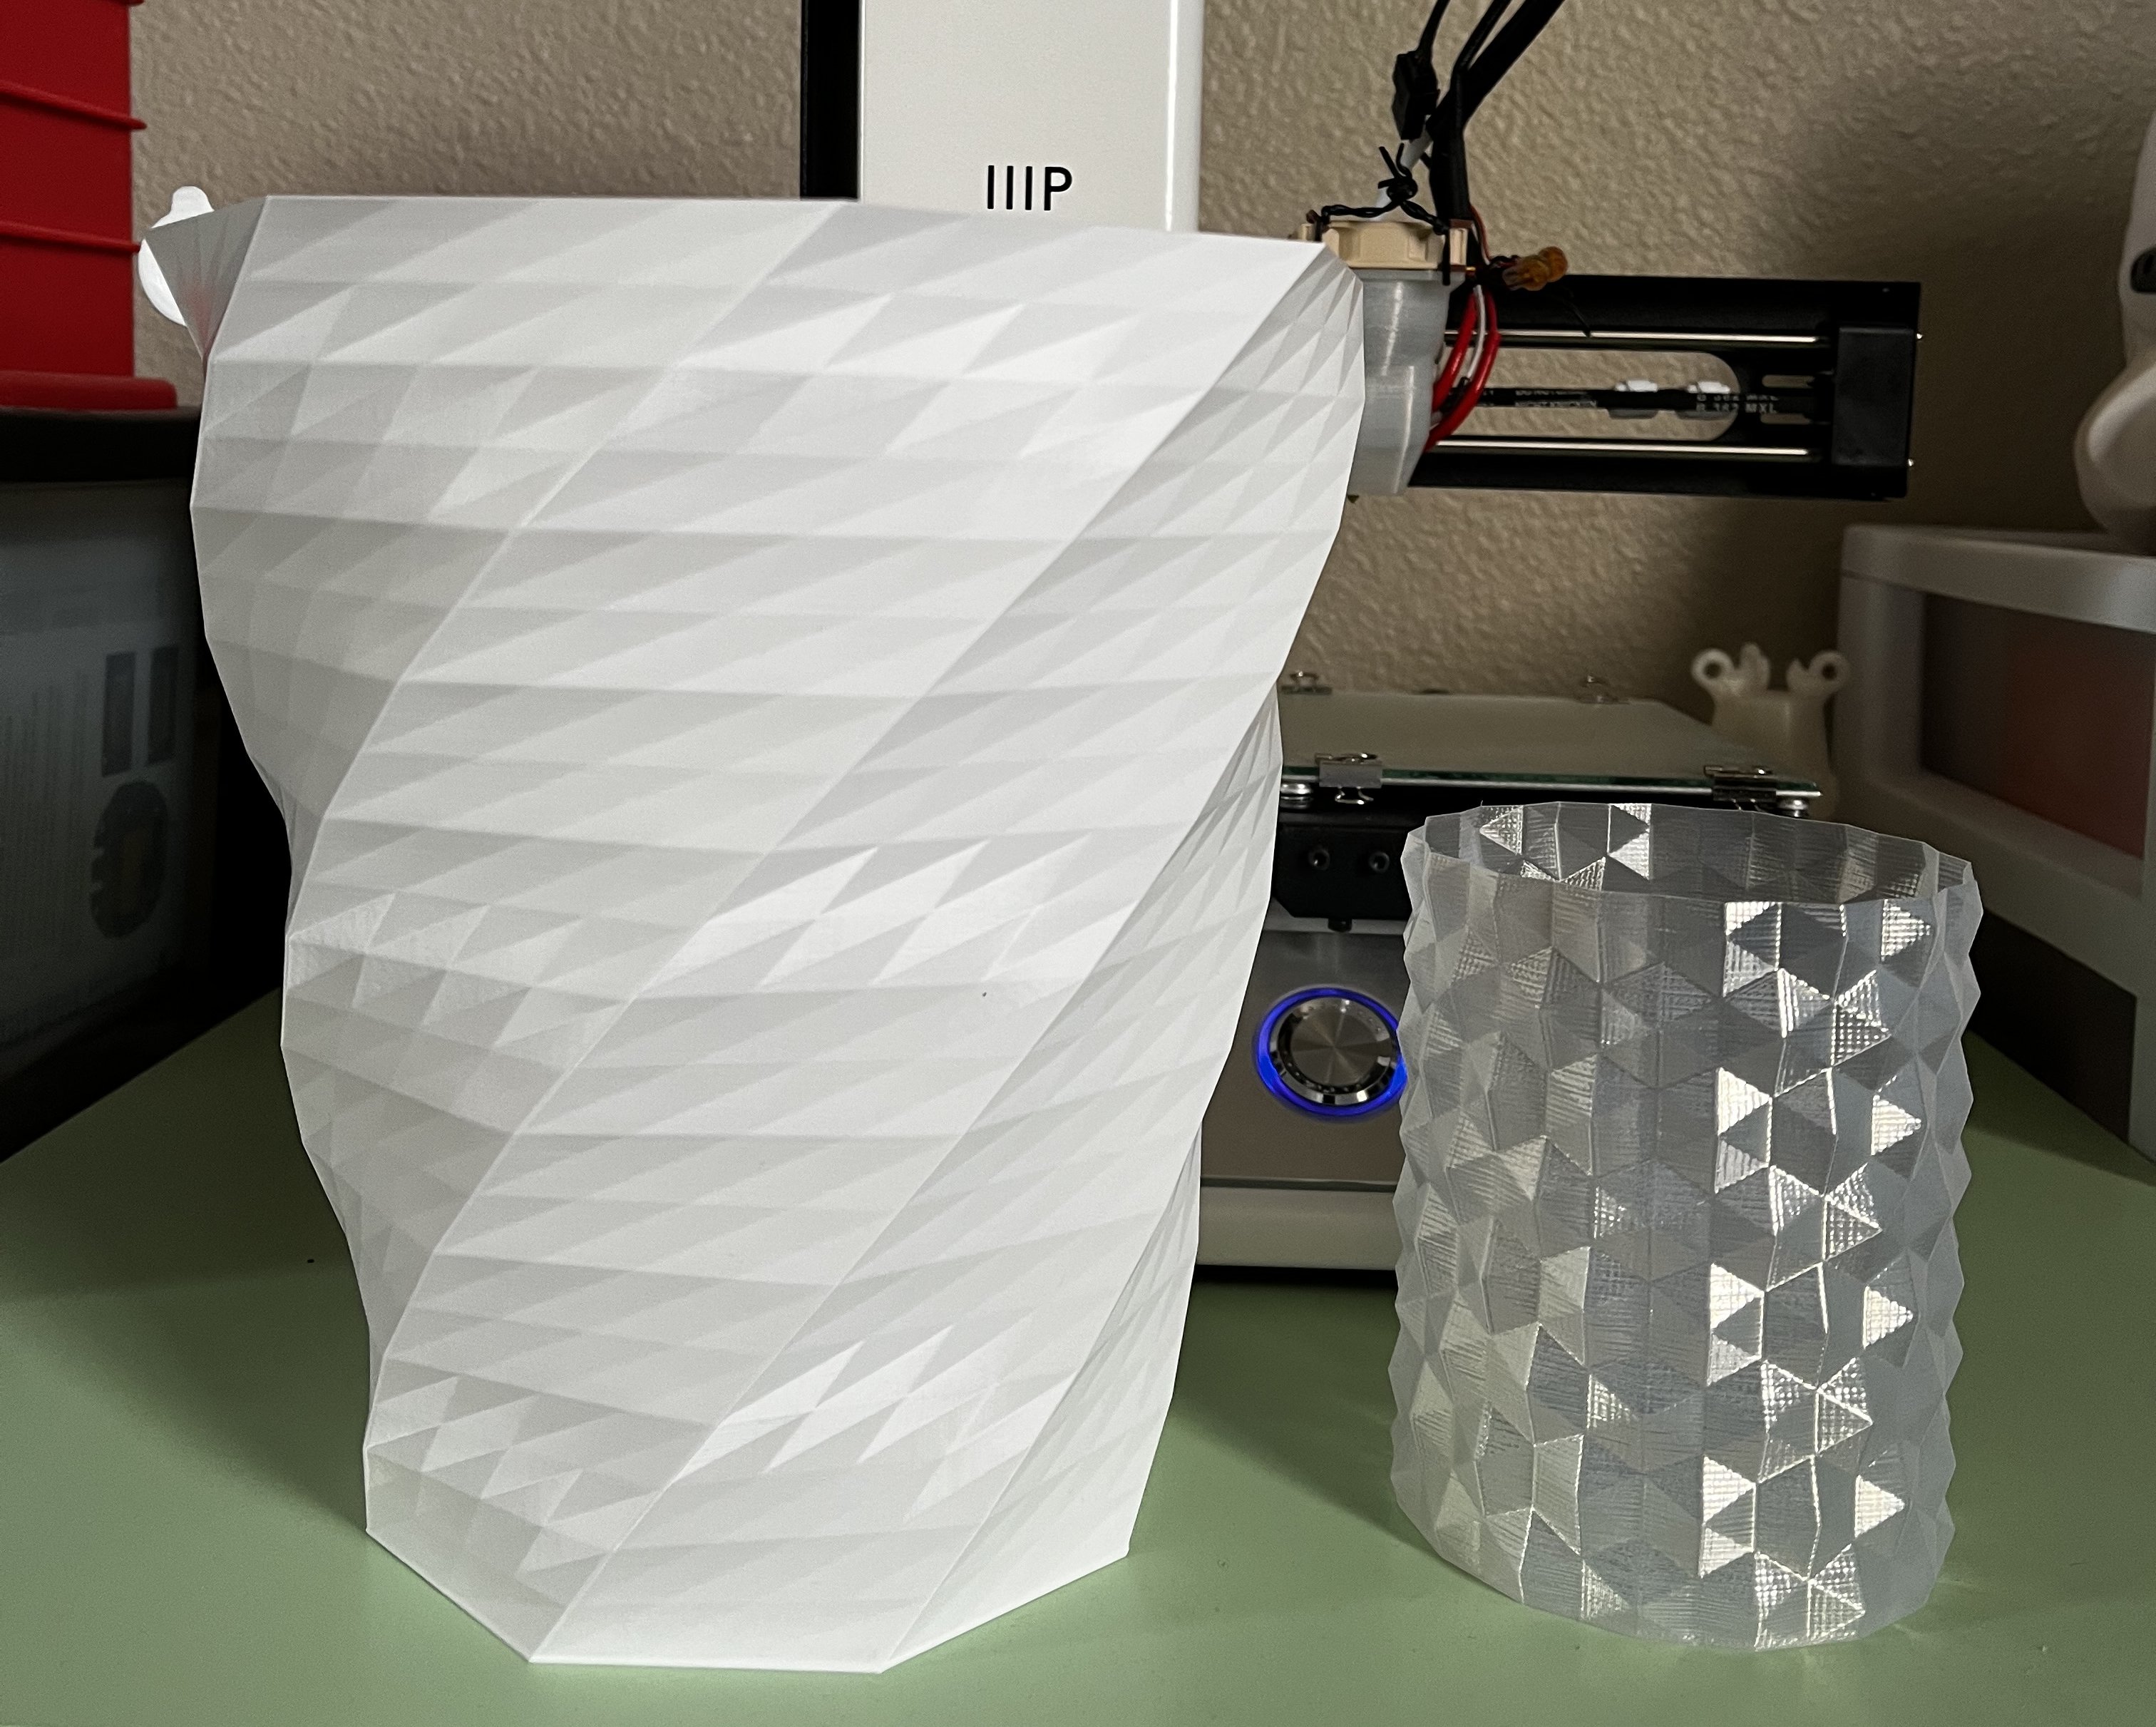
- Vase: I wanted to print something BIG but didn't want it to take forever, so I did a vase mode print over night. It turned out really cool and is much bigger than I was able to print before:
Gridfinity
During September I discovered the YouTuber Zack Freedman, a maker with lots of interesting project videos, many related to 3D printing. One such project of his is "Gridfinity", which is a modular grid-based system for storing all kinds of objects. It's also open source so anyone can make a gridfinity model that fits with the rest of the system!
Essentially how it works is you start by printing a baseplate. It can either be an open grid that you set modules in, or you can print the more filled in version if you'd like your modules to be magnetized or screwed in with M3s to the base. The baseplates are designed so that even if you can only print a 3x3 baseplate, you can set another one side by side to make it 3x6 and everything's still perfectly spaced!
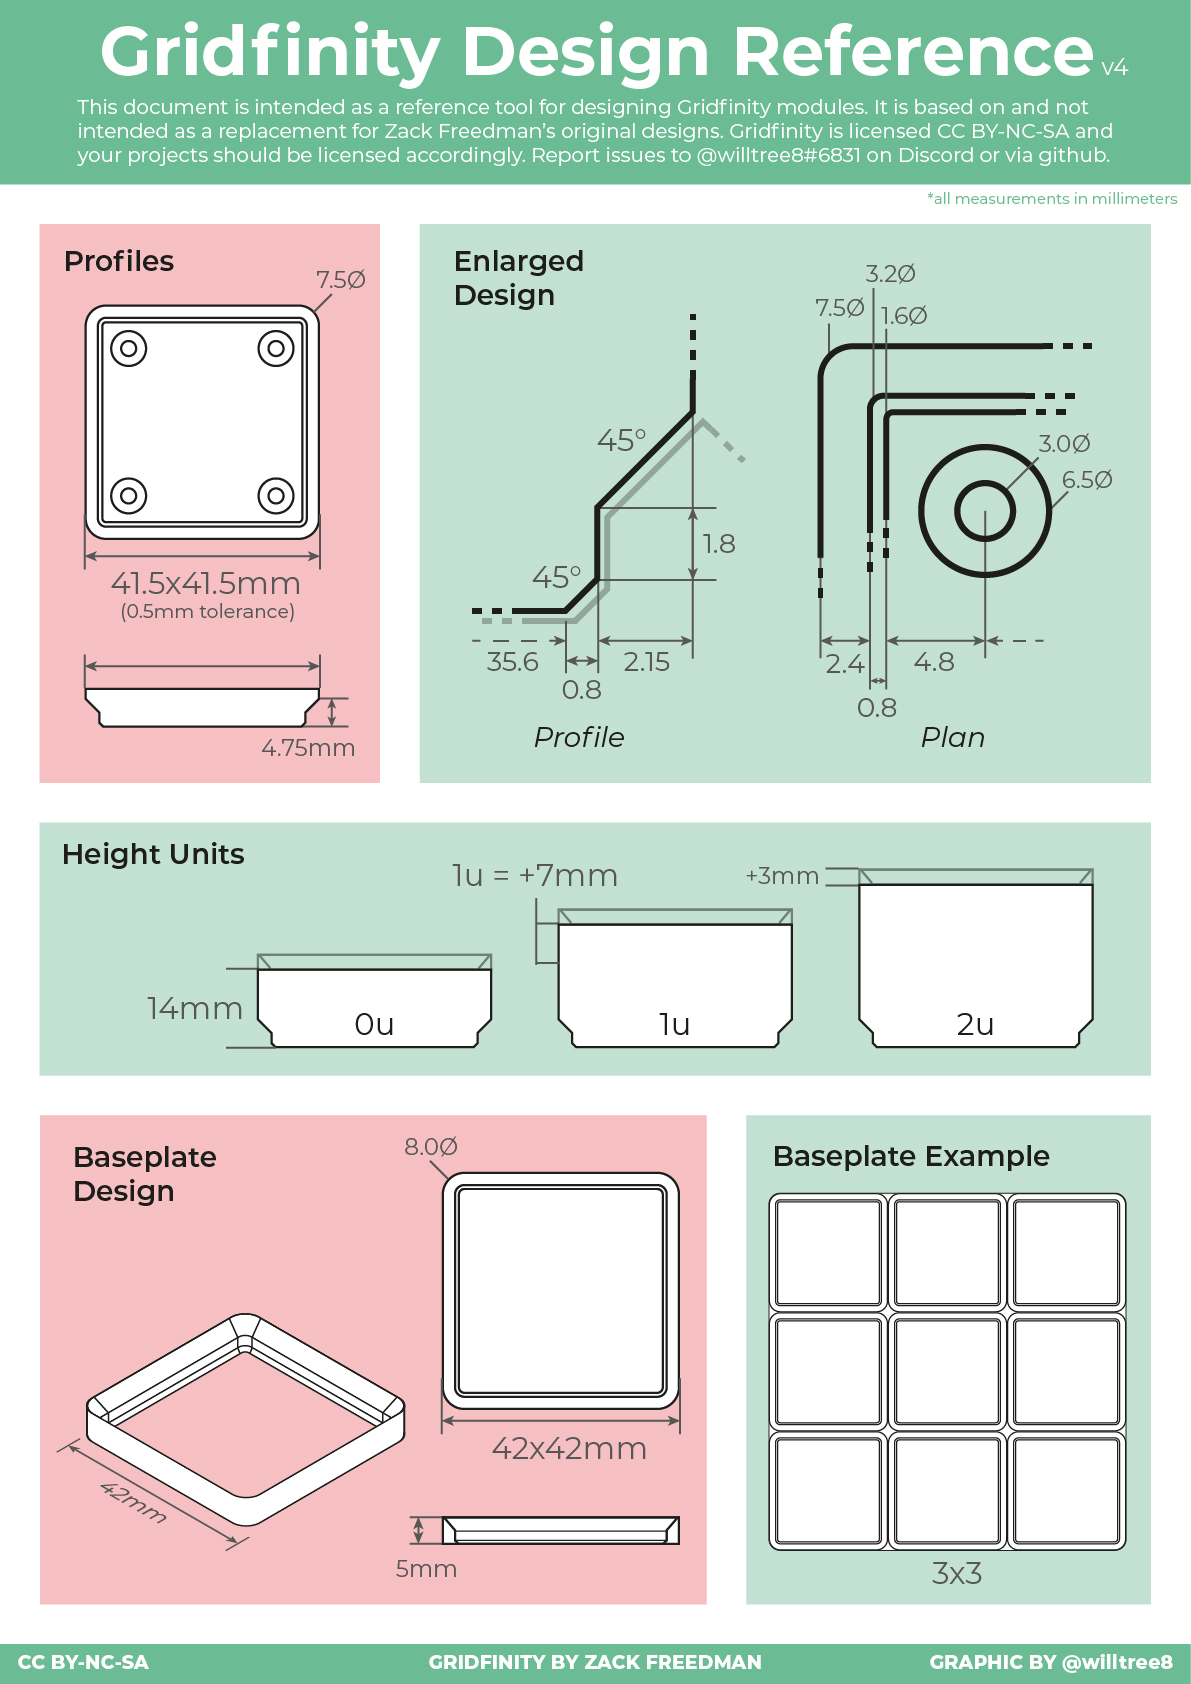
After that, you can start printing modules that fit in the baseplate slots to store whatever you'd like! Modules start at 1x1 "grid units" which is 42x42mm (actually 41.5mm for tolerance) and are 14mm high plus an optional 3mm lip that allows them to be stacked. Height is typically calculated in "u" or units, and for every u the height increases by 7mm. So for instance, if I printed a 2x2 2u module it would be 84x84mm (ignoring tolerance) and 14+7*2= 28mm high, plus the 3mm lip if desired!
If that's all confusing, refer to the handy specification chart below:
Gridfinity initially just made for some good test prints. I printed some baseplates and 1x1 storage bins to get my settings dialed in. I haven't found a good use for them yet but it's fun to stack them and arrange them in the grid! 🙂
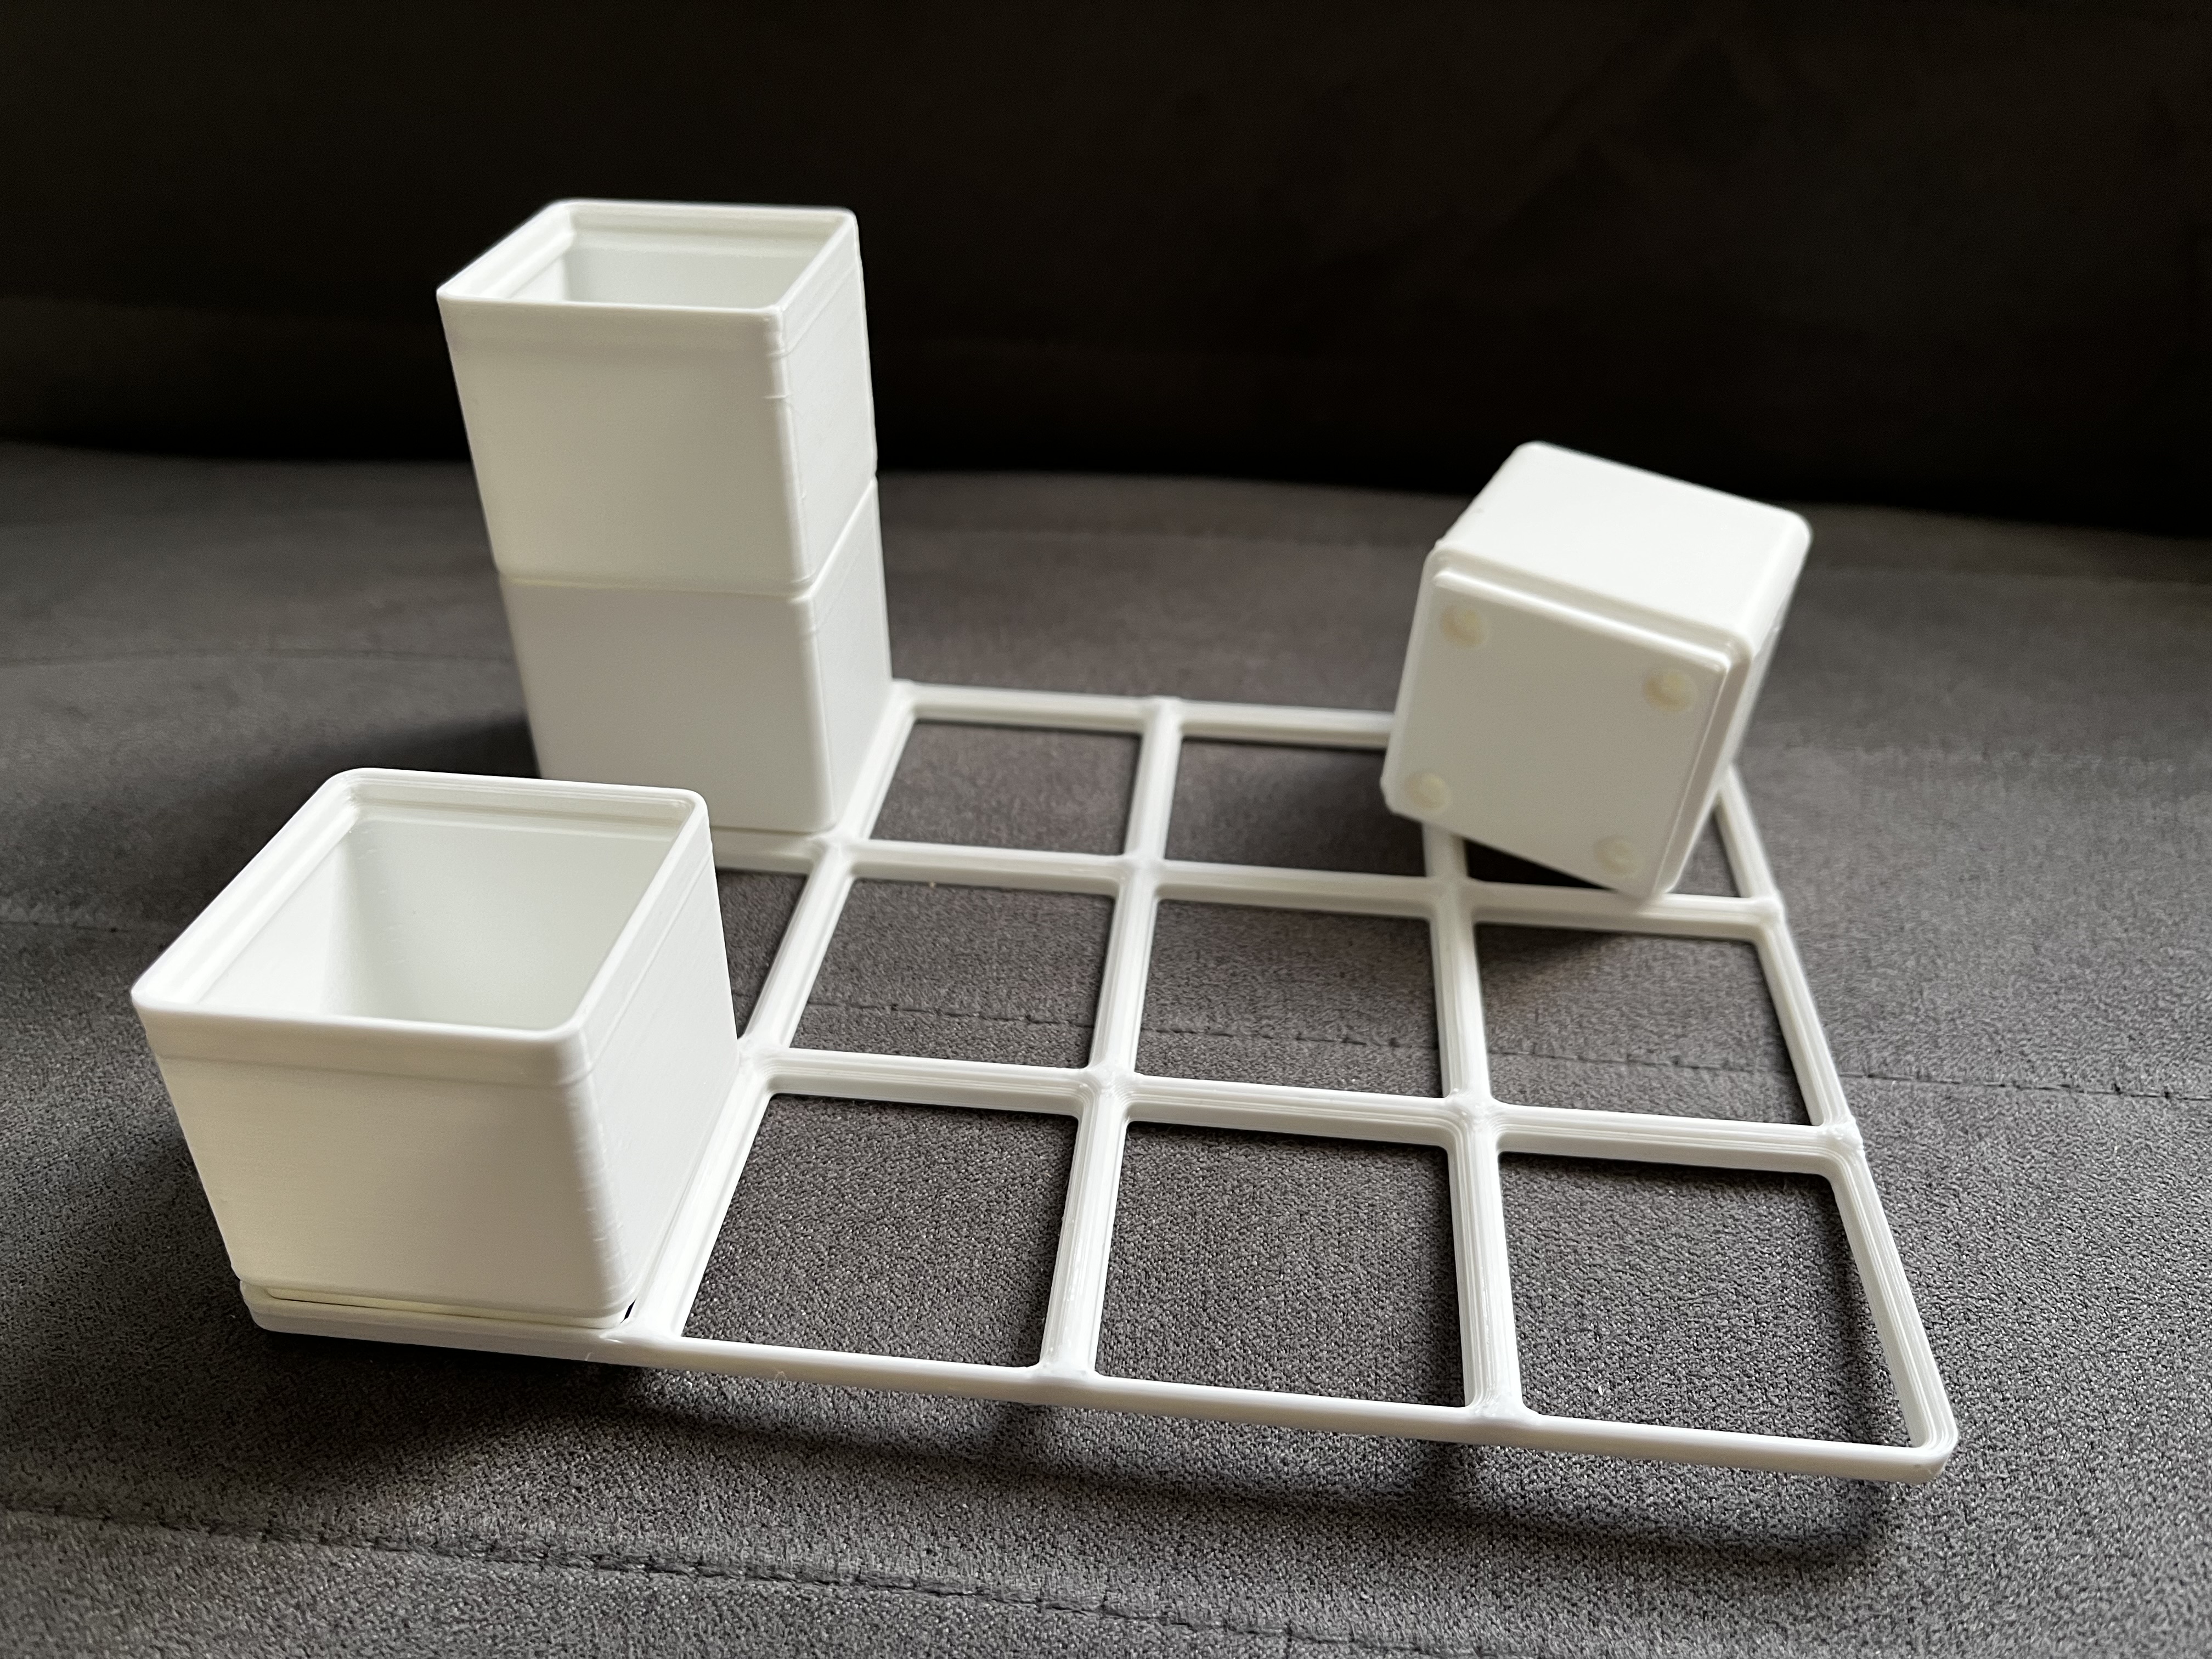
However, while printing standard models was fun, what I really wanted to do was make a gridfinity design for a specific use case in my life. My goal was to create an organizer for our tiny battery drawer and create a place for all of our rechargeable and non-rechargeable AAs, AAAs, 9V, and miscellaneous coin cell batteries.
I decided to go with a 3x3 gridfinity base, at a slightly unconventional 7/8u height. Unfortunately 1u was too tall and since I was going to be doing a fraction regardless, I went with the most normal looking fraction I could while maximizing the height. It ended up being pretty much perfect, landing just under my limit of 40mm.
With the base in place I started making cutouts in Fusion 360 for all of the battery slots. First, I made the largest cutouts for the AA and AAA batteries. At the bottom I made an peaked/angled floor with the idea that the rechargeable batteries would roll one way, and non-rechargeable the other. After that I used the Rectangular Pattern feature to create a set of evenly sized & spaced coin cell battery holders. Lastly I added some basic finger slots everywhere to make it easier to pull batteries out. With that, I had a finished model:
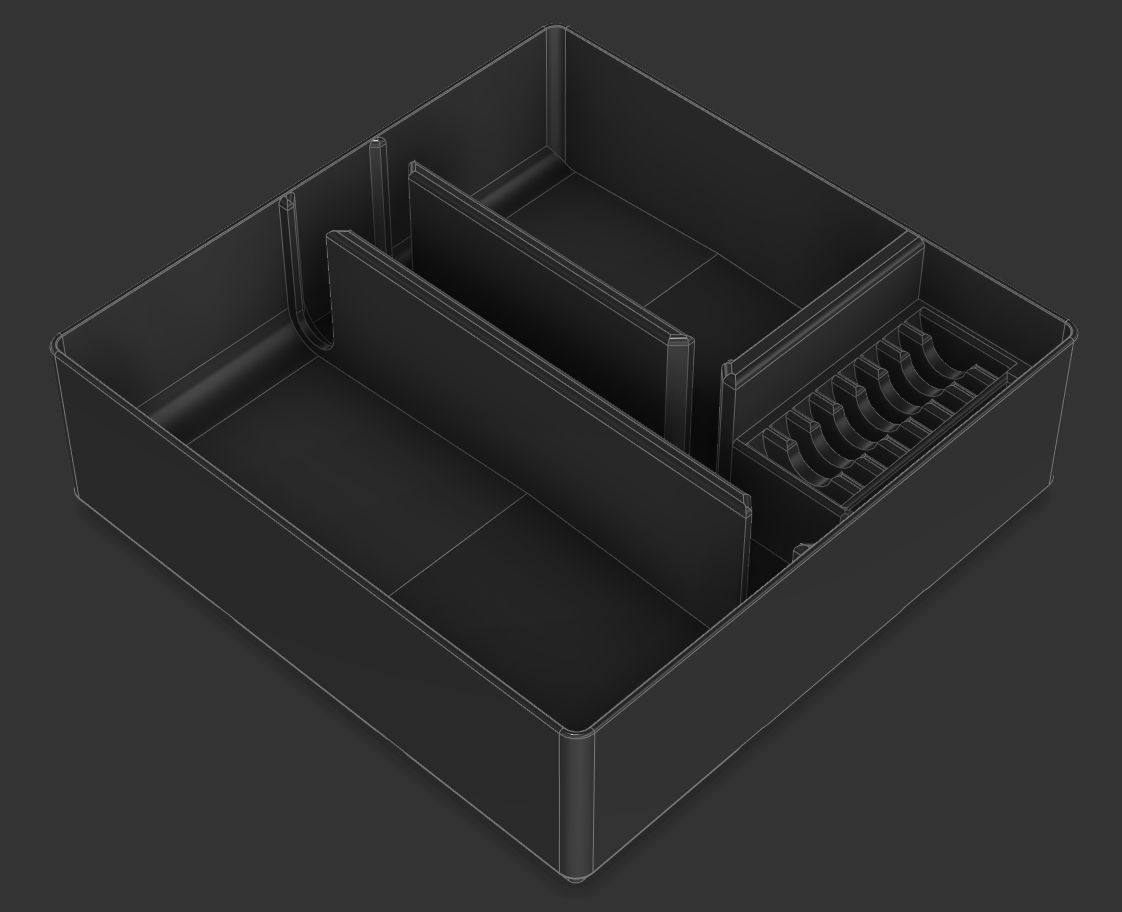
And once you have a 3D model, you can print it! Here's how it turned out:
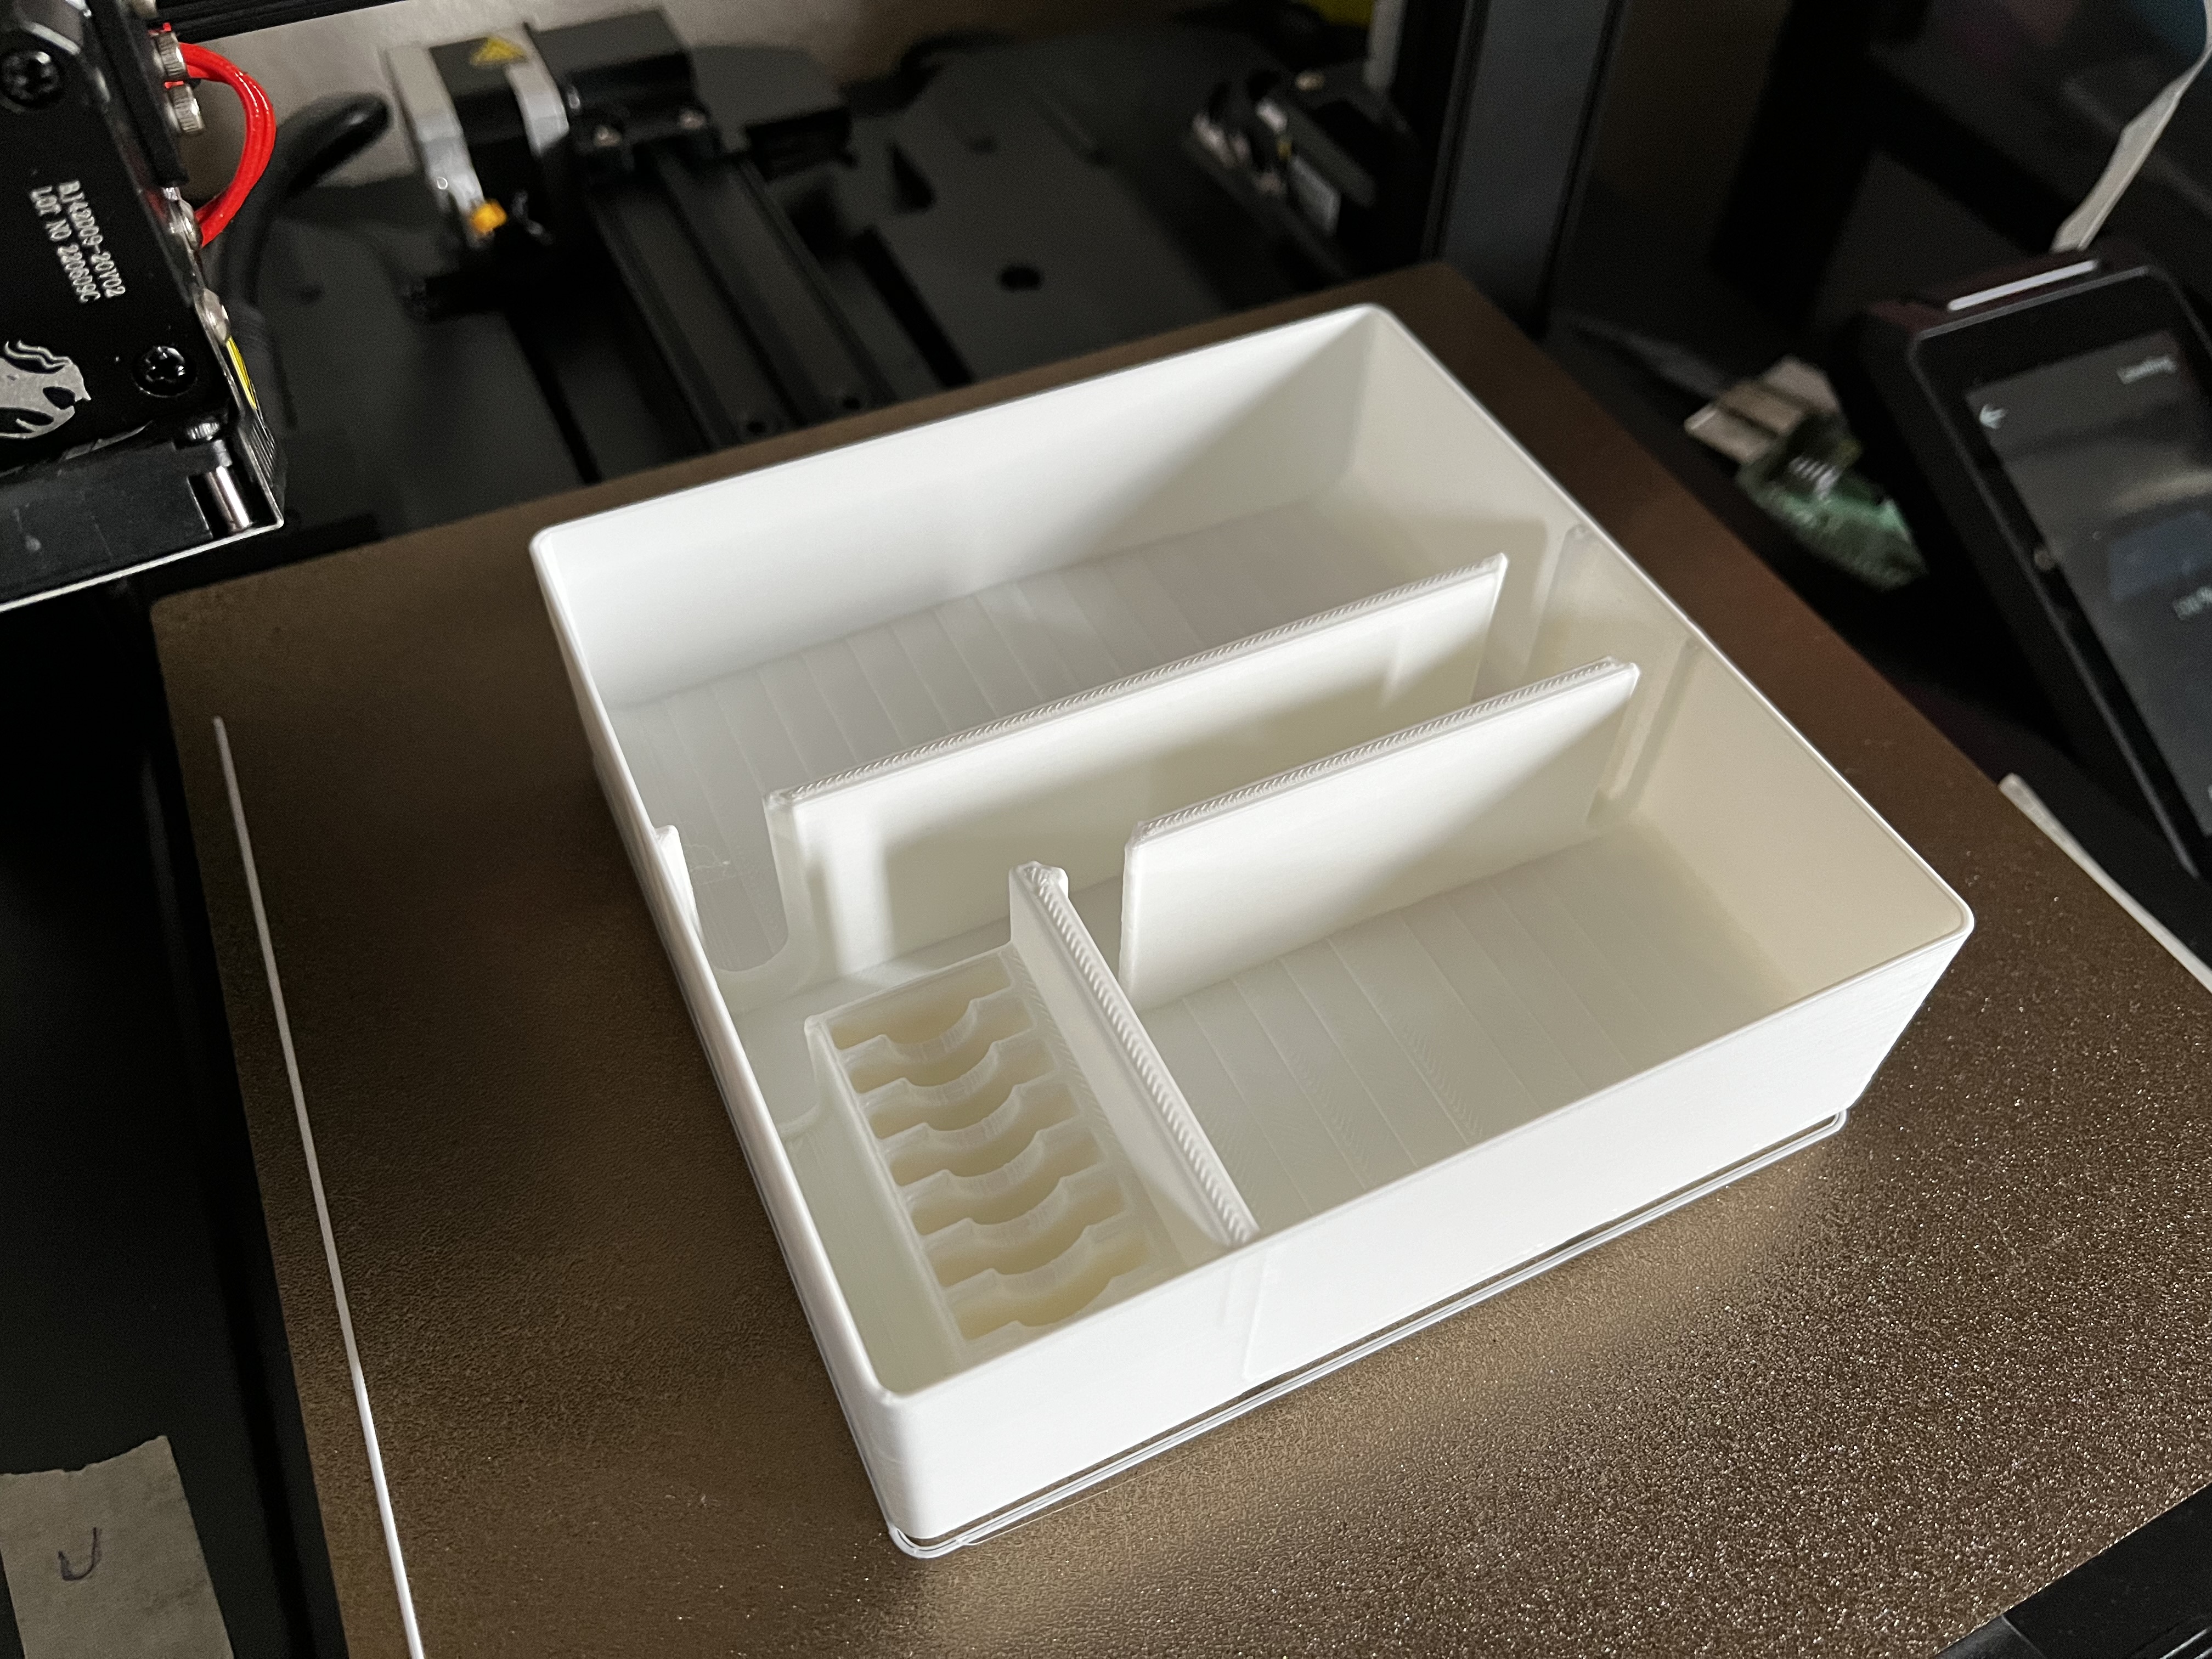
Overall I'm decently happy with how it turned out, but there are definitely some things I would change if I had more time. I say that because, though the printer was providing decent prints, it wasn't quite doing everything it advertised and so I was running up against my deadline to return it. More on that later. Anyway, for this reason, I only had one shot.
The Requested Tray
Finally, it was time to address the reason why I actually got the printer--creating the tray my grandpa requested. In the way that all great stories begin, I again broke out Fusion 360.
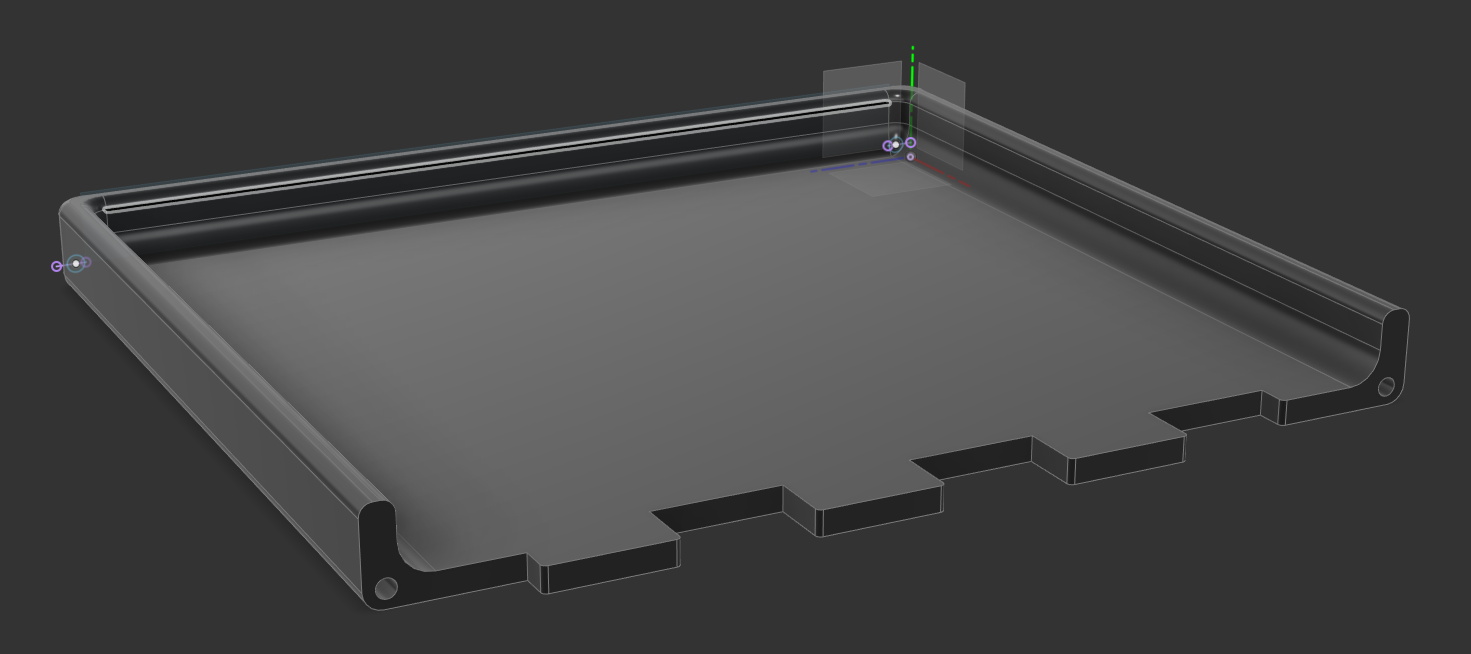
Initially it seemed like the project was going to be pretty straightforward--design the basic tray to the dimensions provided, round some corners, and done. However, due to the size, I was going to need to print it in two pieces and join it together in the middle which is something I hadn't really done before.
I settled on a plan--first, I would create 2 holes inside the edges so I could connect the two pieces with wooden dowels and give it additional strength. Then, I would make a zig zag pattern in the middle to give the two pieces more surface area to connect together for when I super-glued them together.
Making the basic tray shape was the easy part, pretty quickly I had a basic model:
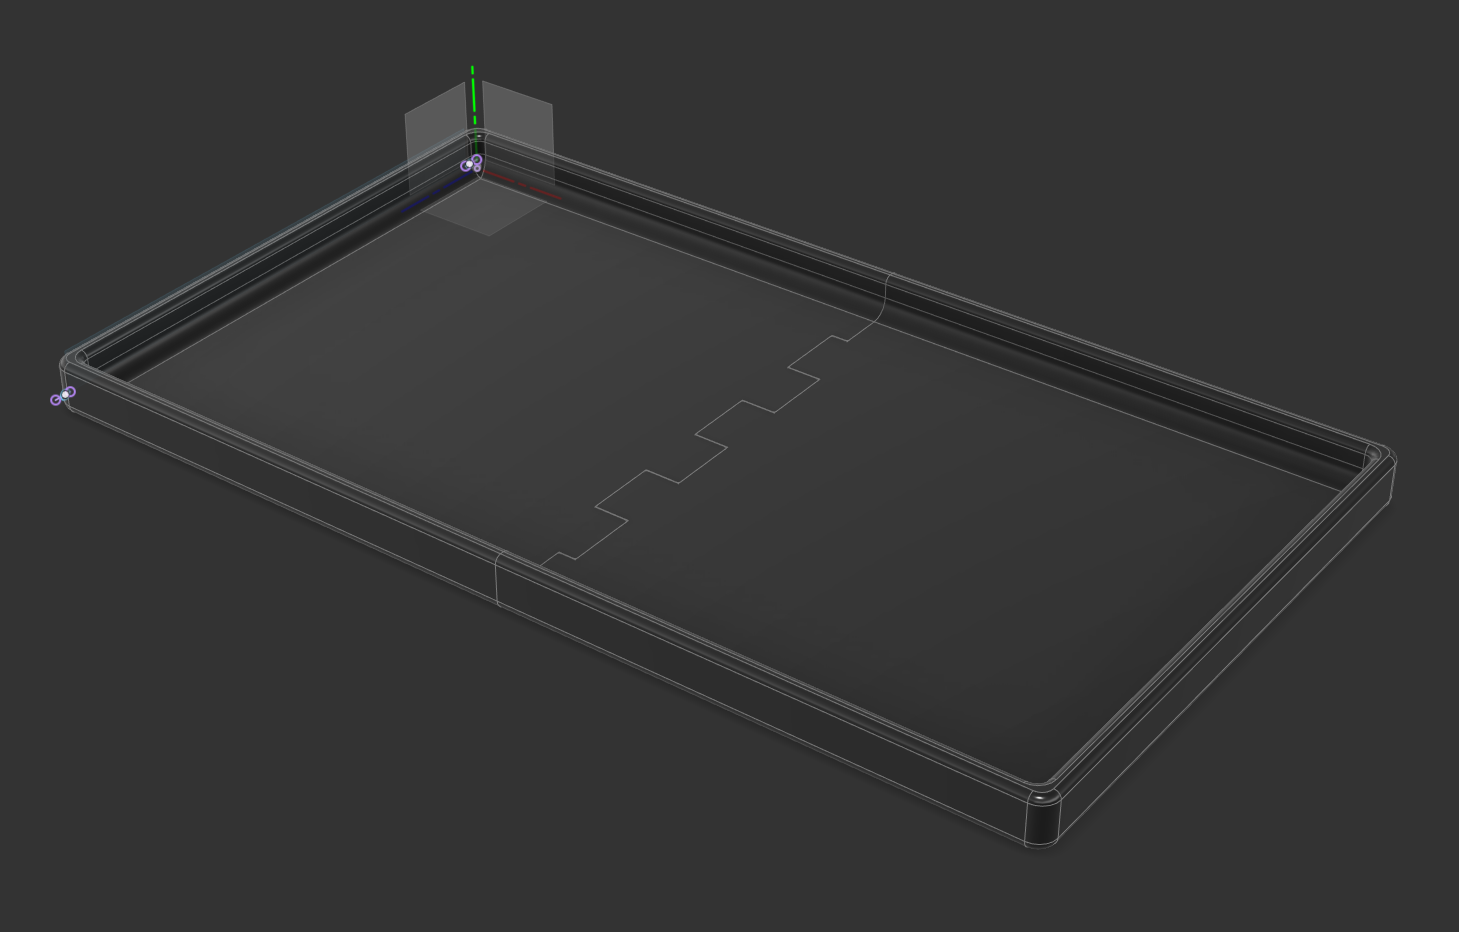
What took awhile was dialing in the connecting edge:
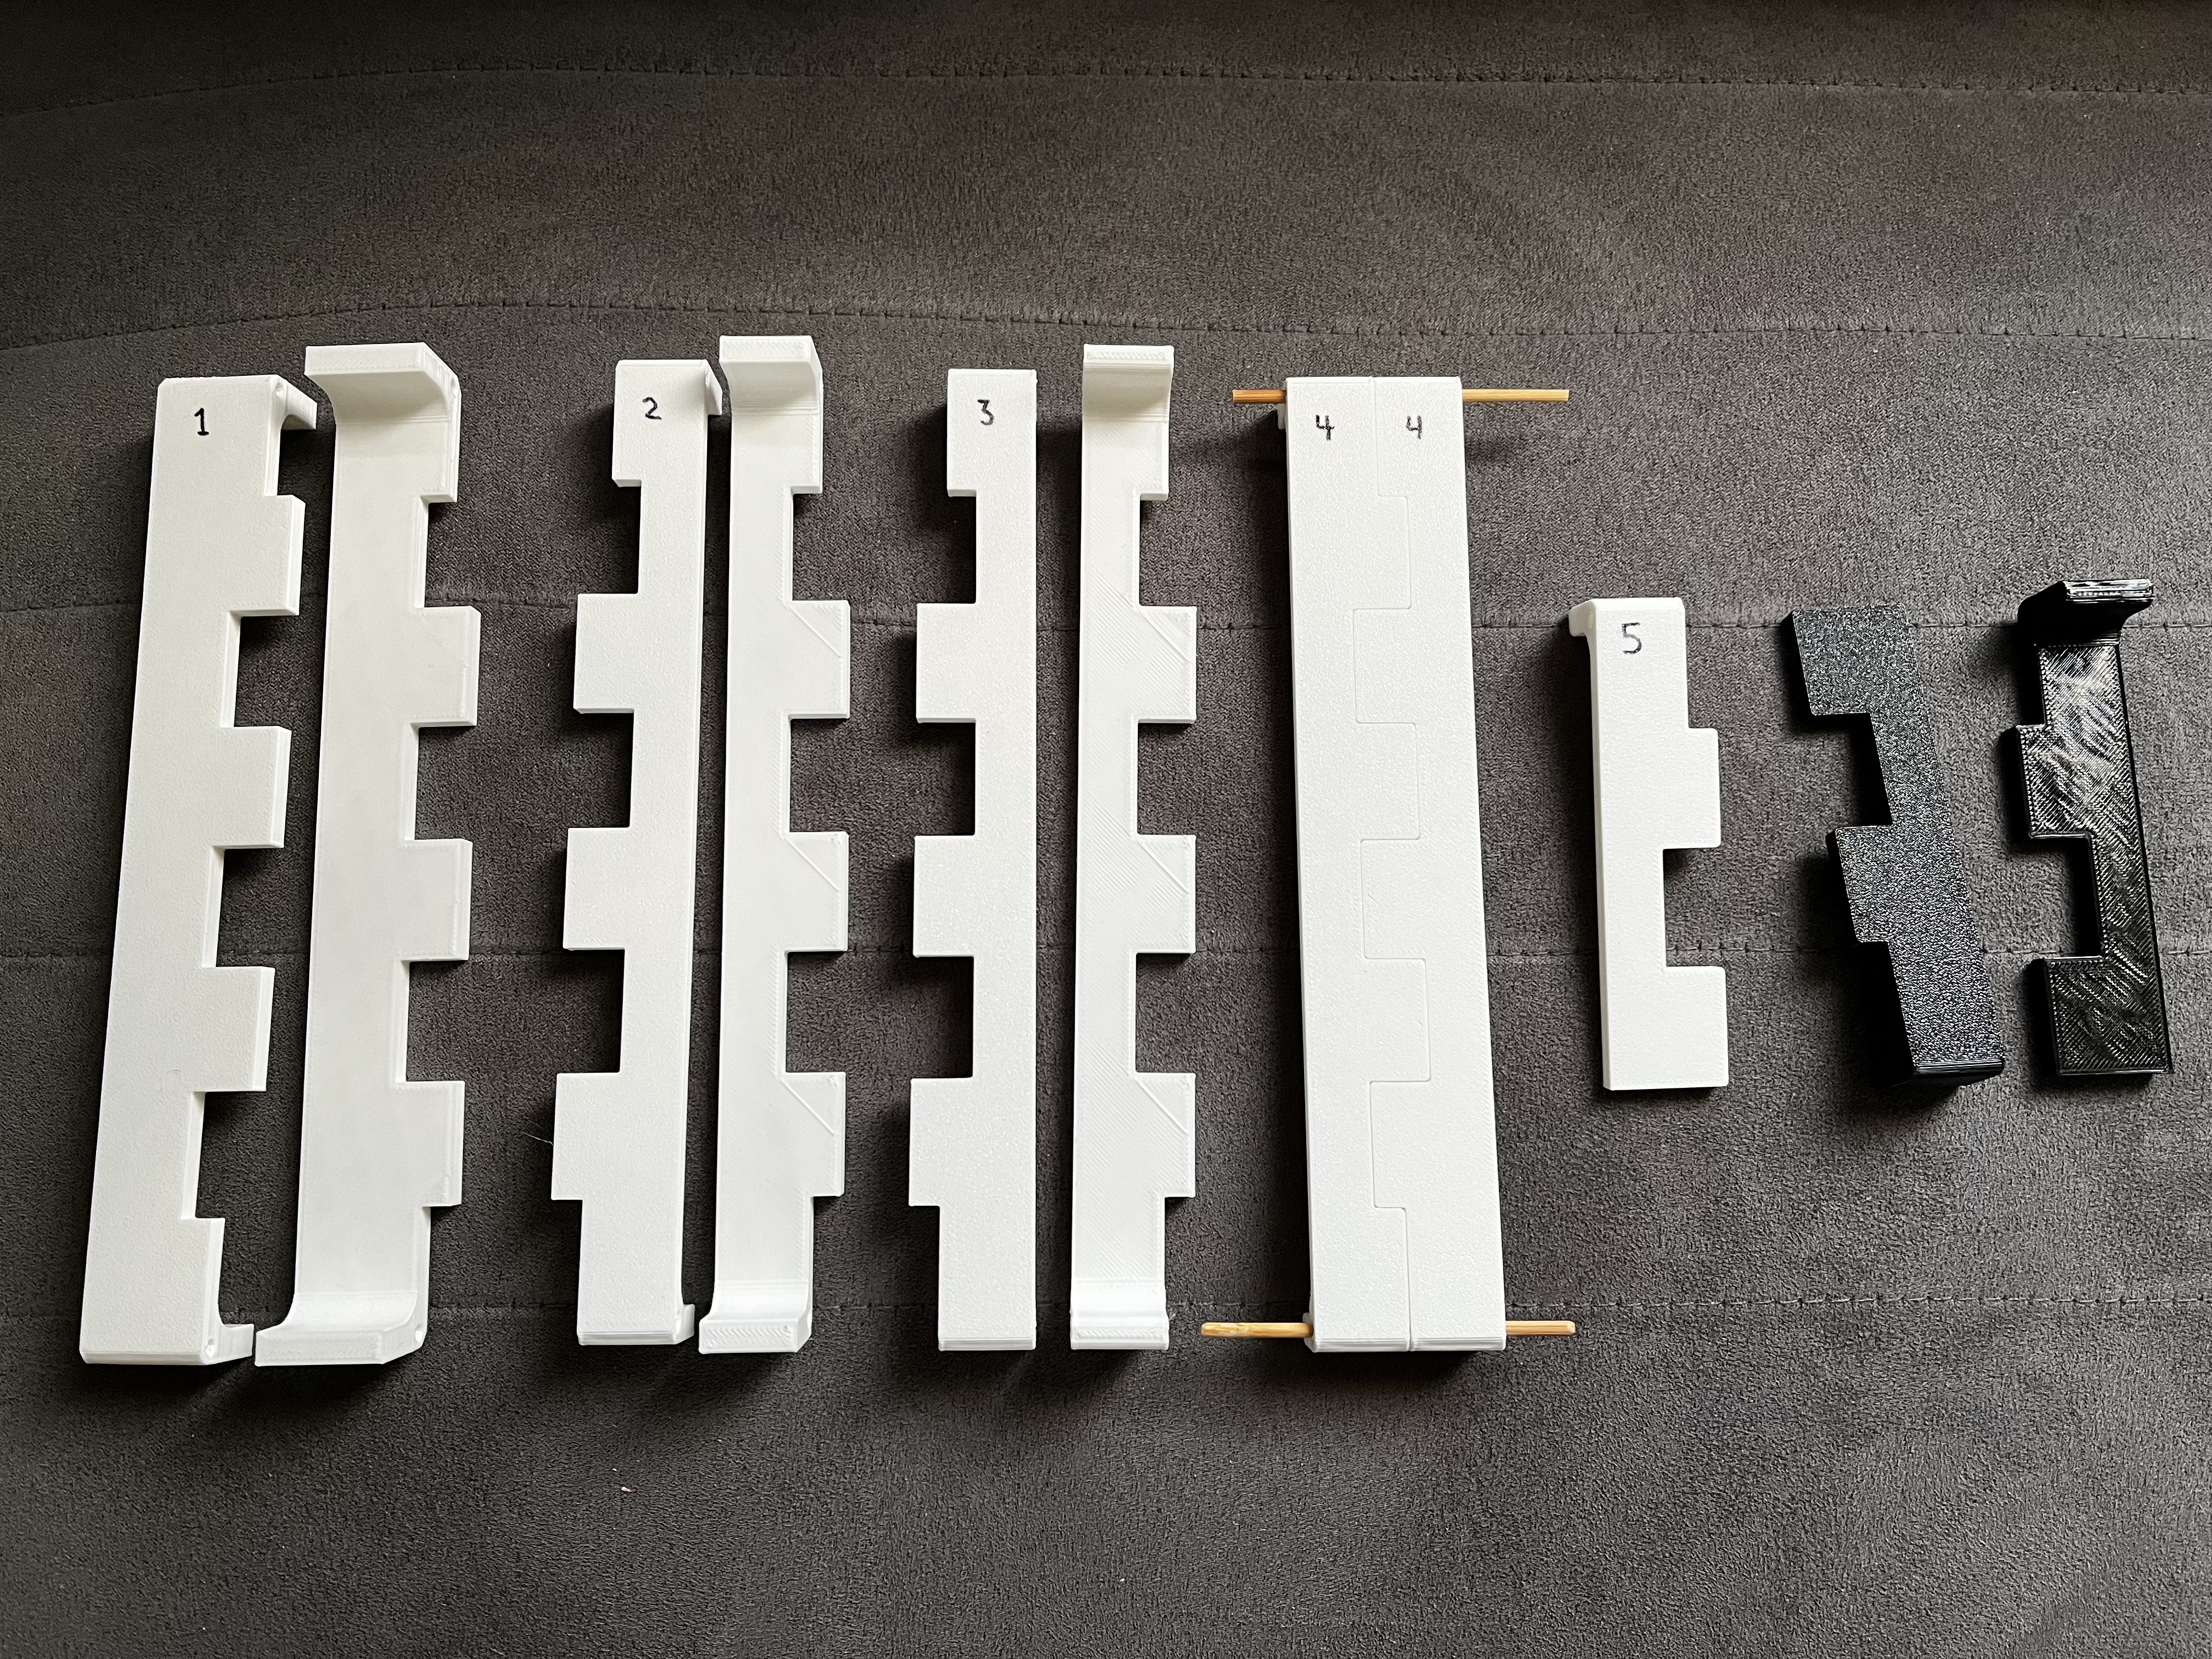
Designing that in software was all well and good, but actually printing it out and connecting the parts was the true test. Before I could get a fitment I was satisfied with, I adjusted the space between the "teeth" and the shaping on the corners many times before I got the two parts to fit together just right. Essentially, I needed the parts to be as snug as possible without being too tight to where I couldn't glue them together without all the glue squishing out.
Behold, every prototype I did before settling on a final connecting-edge design:
When it came time to print, I did something you should NEVER do in engineering when running up against a deadline. Swap out a known factor and introduce new variables.
Here's the dumb thing I did: my plan was to print in black PLA plastic (very easy to print with and in fact the only plastic I've ever used). Well, my black PLA order was not arriving at the advertised time so instead I decided to try out a different, stronger filament that I had zero experience with called PETG.
Fortunately, it's still pretty easy to work with and everything turned out ok, but I barely had time to print one last quick prototype and print each of the two parts. I believe it took about 10-12 hours for each half, so I really didn't have time for a failure to occur.
Anyway, after printing everything I glued it all together and delivered it to my Grandpa on thanksgiving. He was ecstatic!
Problem
In the end, I had a lot of fun rekindling my interest in 3D printing, but it wasn't without its setbacks. As mentioned, I wasn't completely satisfied with the Ender 3 S1 Pro.
The reason was primarily because of the Automatic Bed Leveling feature it advertised. How it works is the print head has a sensor connected to it that can precisely measure the tiny differences in height on the printing surface. After taking these measurements, the printer can factor in these measurements and slightly alter the path of the print nozzle, compensating for the curvature of the bed and in theory, printing a perfect first layer.
In my experience, that was not the case with the Ender 3 S1 Pro. I was generally able to get pretty good first layers, but I had to stop relying on the automatic bed leveling feature almost entirely and just calibrate the distance with a piece of paper.
I am confident that I tried just about everything I could have to get it to work (updating firmware, tweaking gcode, straightening the bed, measuring bed curvature in octoprint, etc), and most of the people on the Facebook group just told me it was something that didn't work perfectly on the printer and to ignore it, or to buy certain parts or mods to try to make it work by other means. And of course, with the Ender 3 S1 Pro being a Creality brand printer, all of the support you get is from the community. Their official resources were no help.
Since ABL was one of the primary reasons I wanted a new printer, I decided I would make the most of having the printer and achieve the best prints I could while I had it. After that, I packaged it back up and shipped it off to Amazon.
Solution
I decided it was time to buy nice. I sucked it up and ordered the Prusa i3 MK3S+ over Black Friday when they have their best deals. But I'll leave the details about that project for another time 🙂
Thanks for reading!