Building My First Mechanical Keyboard Number Pad
Shortly after I built my current PC in 2019, I went down the mechanical keyboard rabbit hole and purchased a Keychron K2. However, since I often enjoy building things myself, I really wanted to make my own mechanical keyboard. The problem, as you may or may not know, is that mechanical keyboards quickly become an expensive hobby! So I settled on the middle-ground of building a mechanical number pad. This had the benefit of being less expensive than constructing a full keyboard while still scratching the itch!
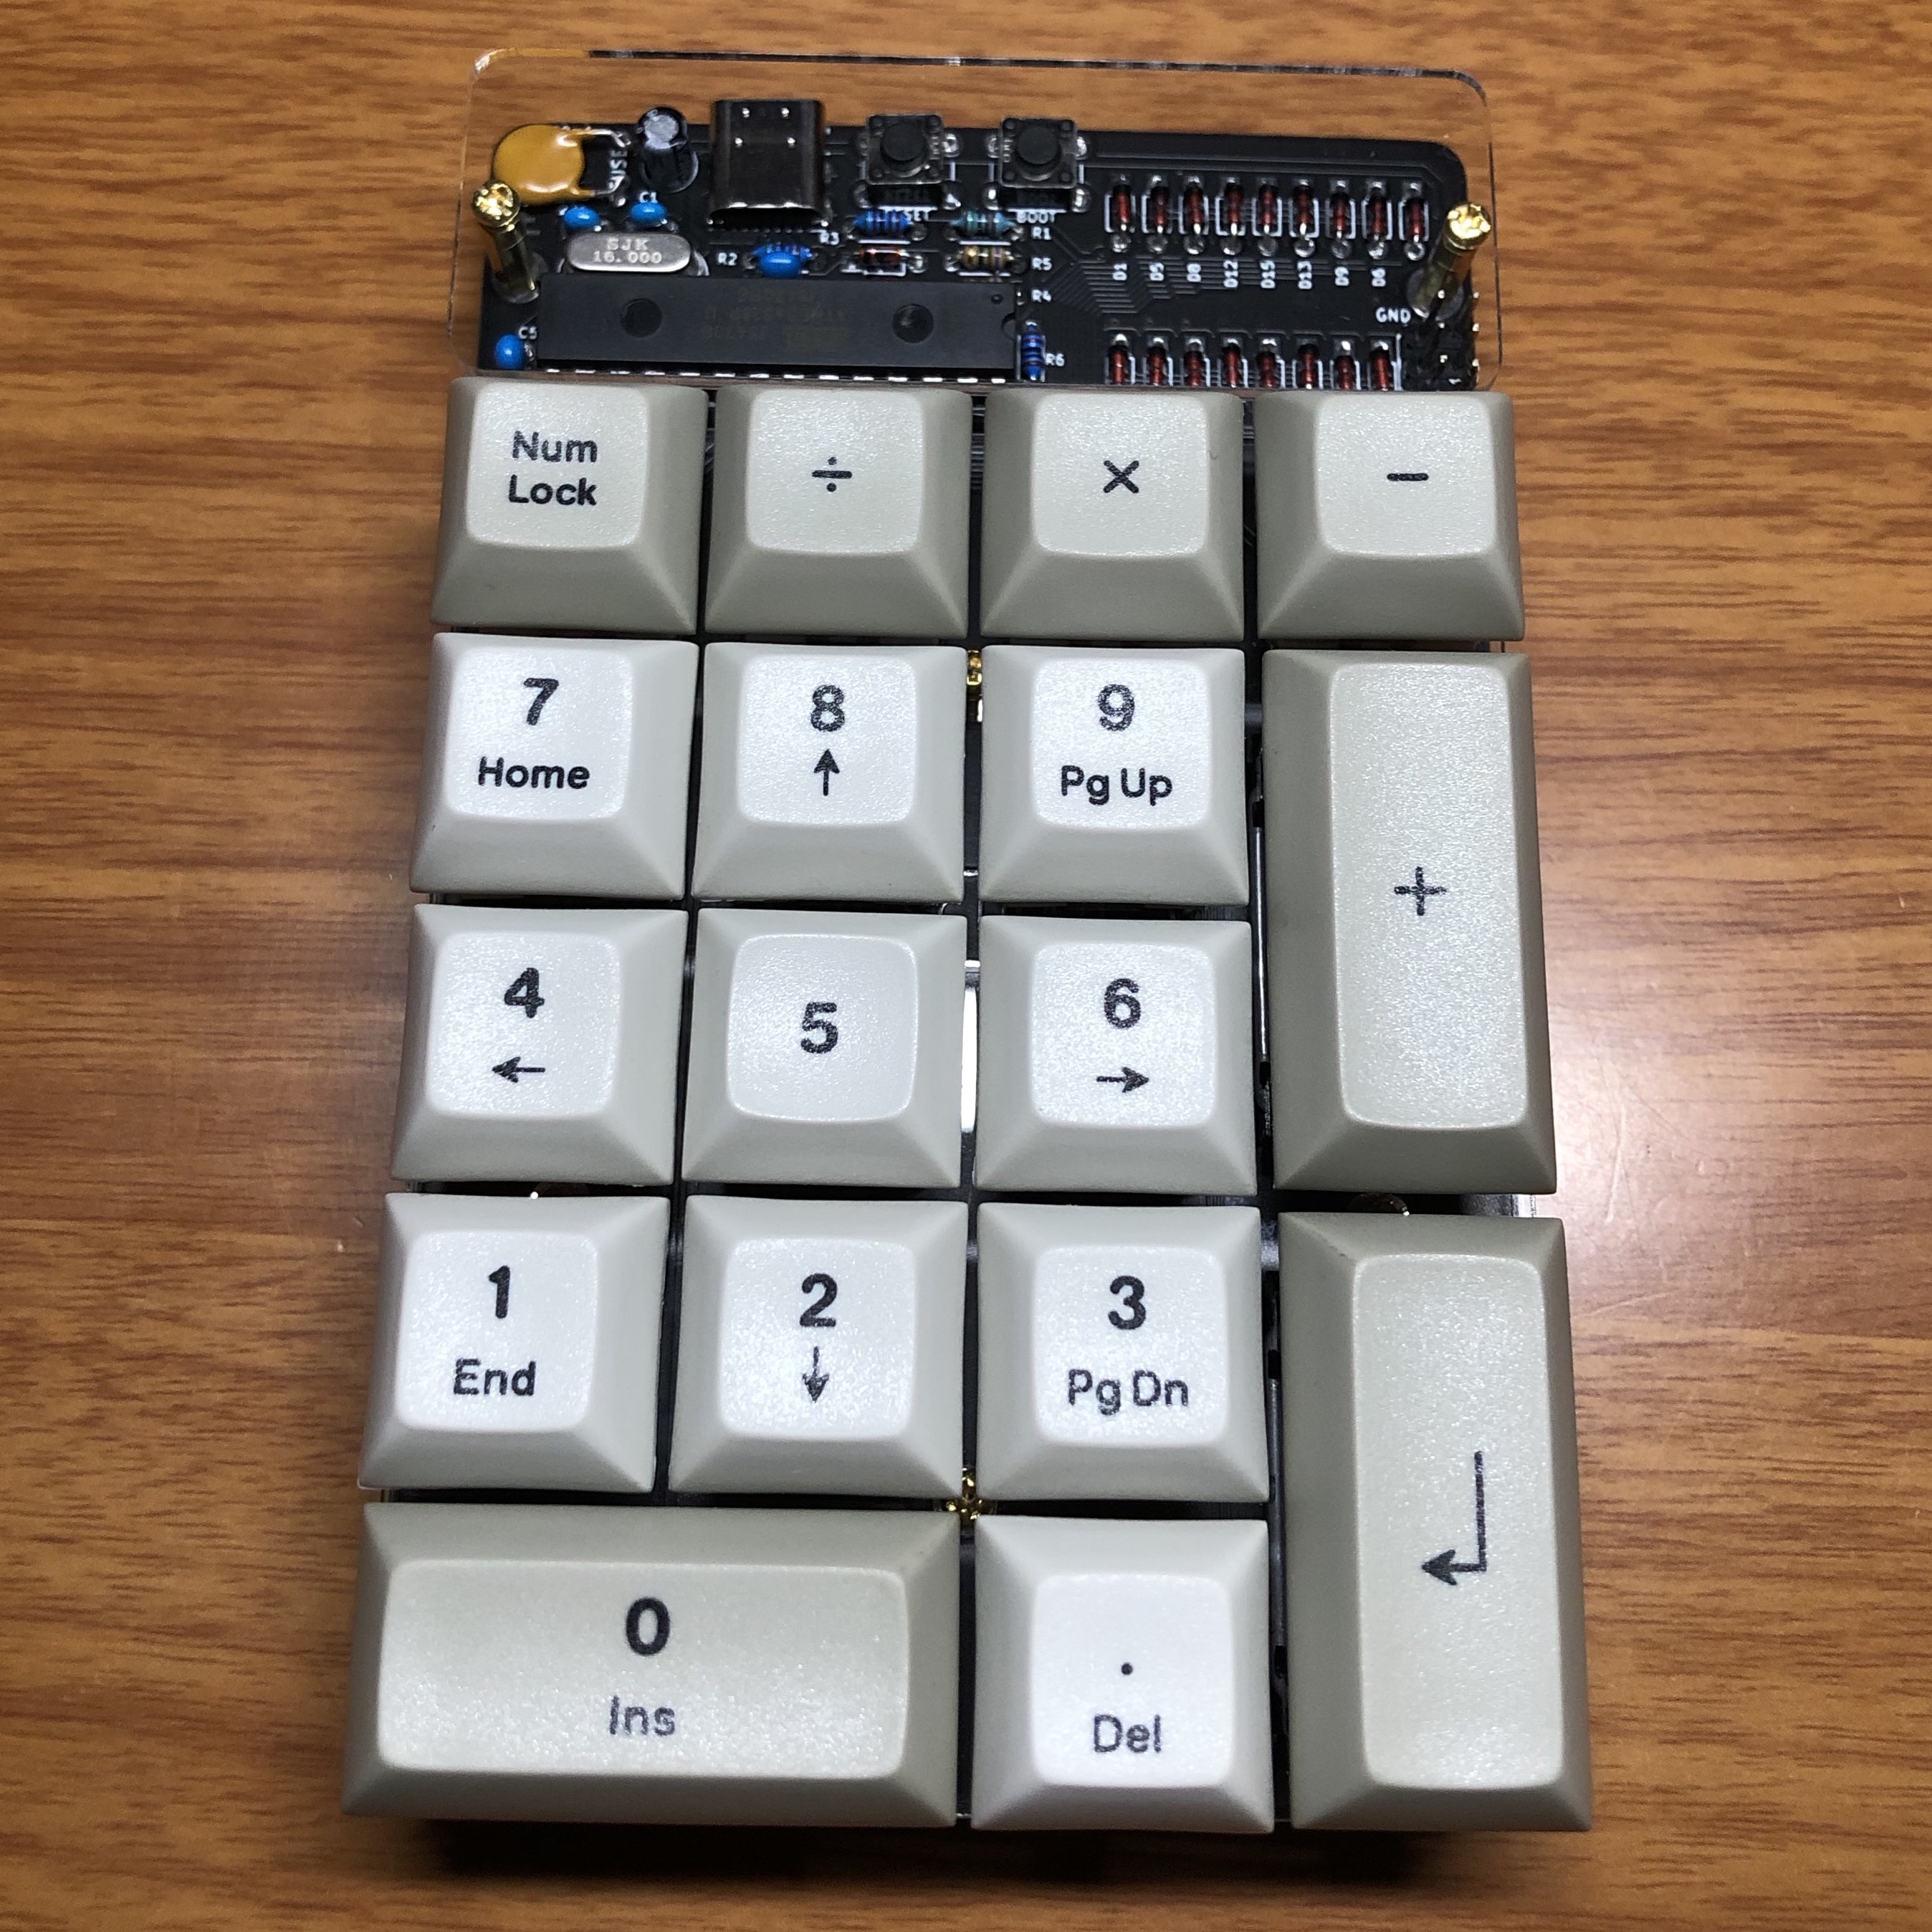
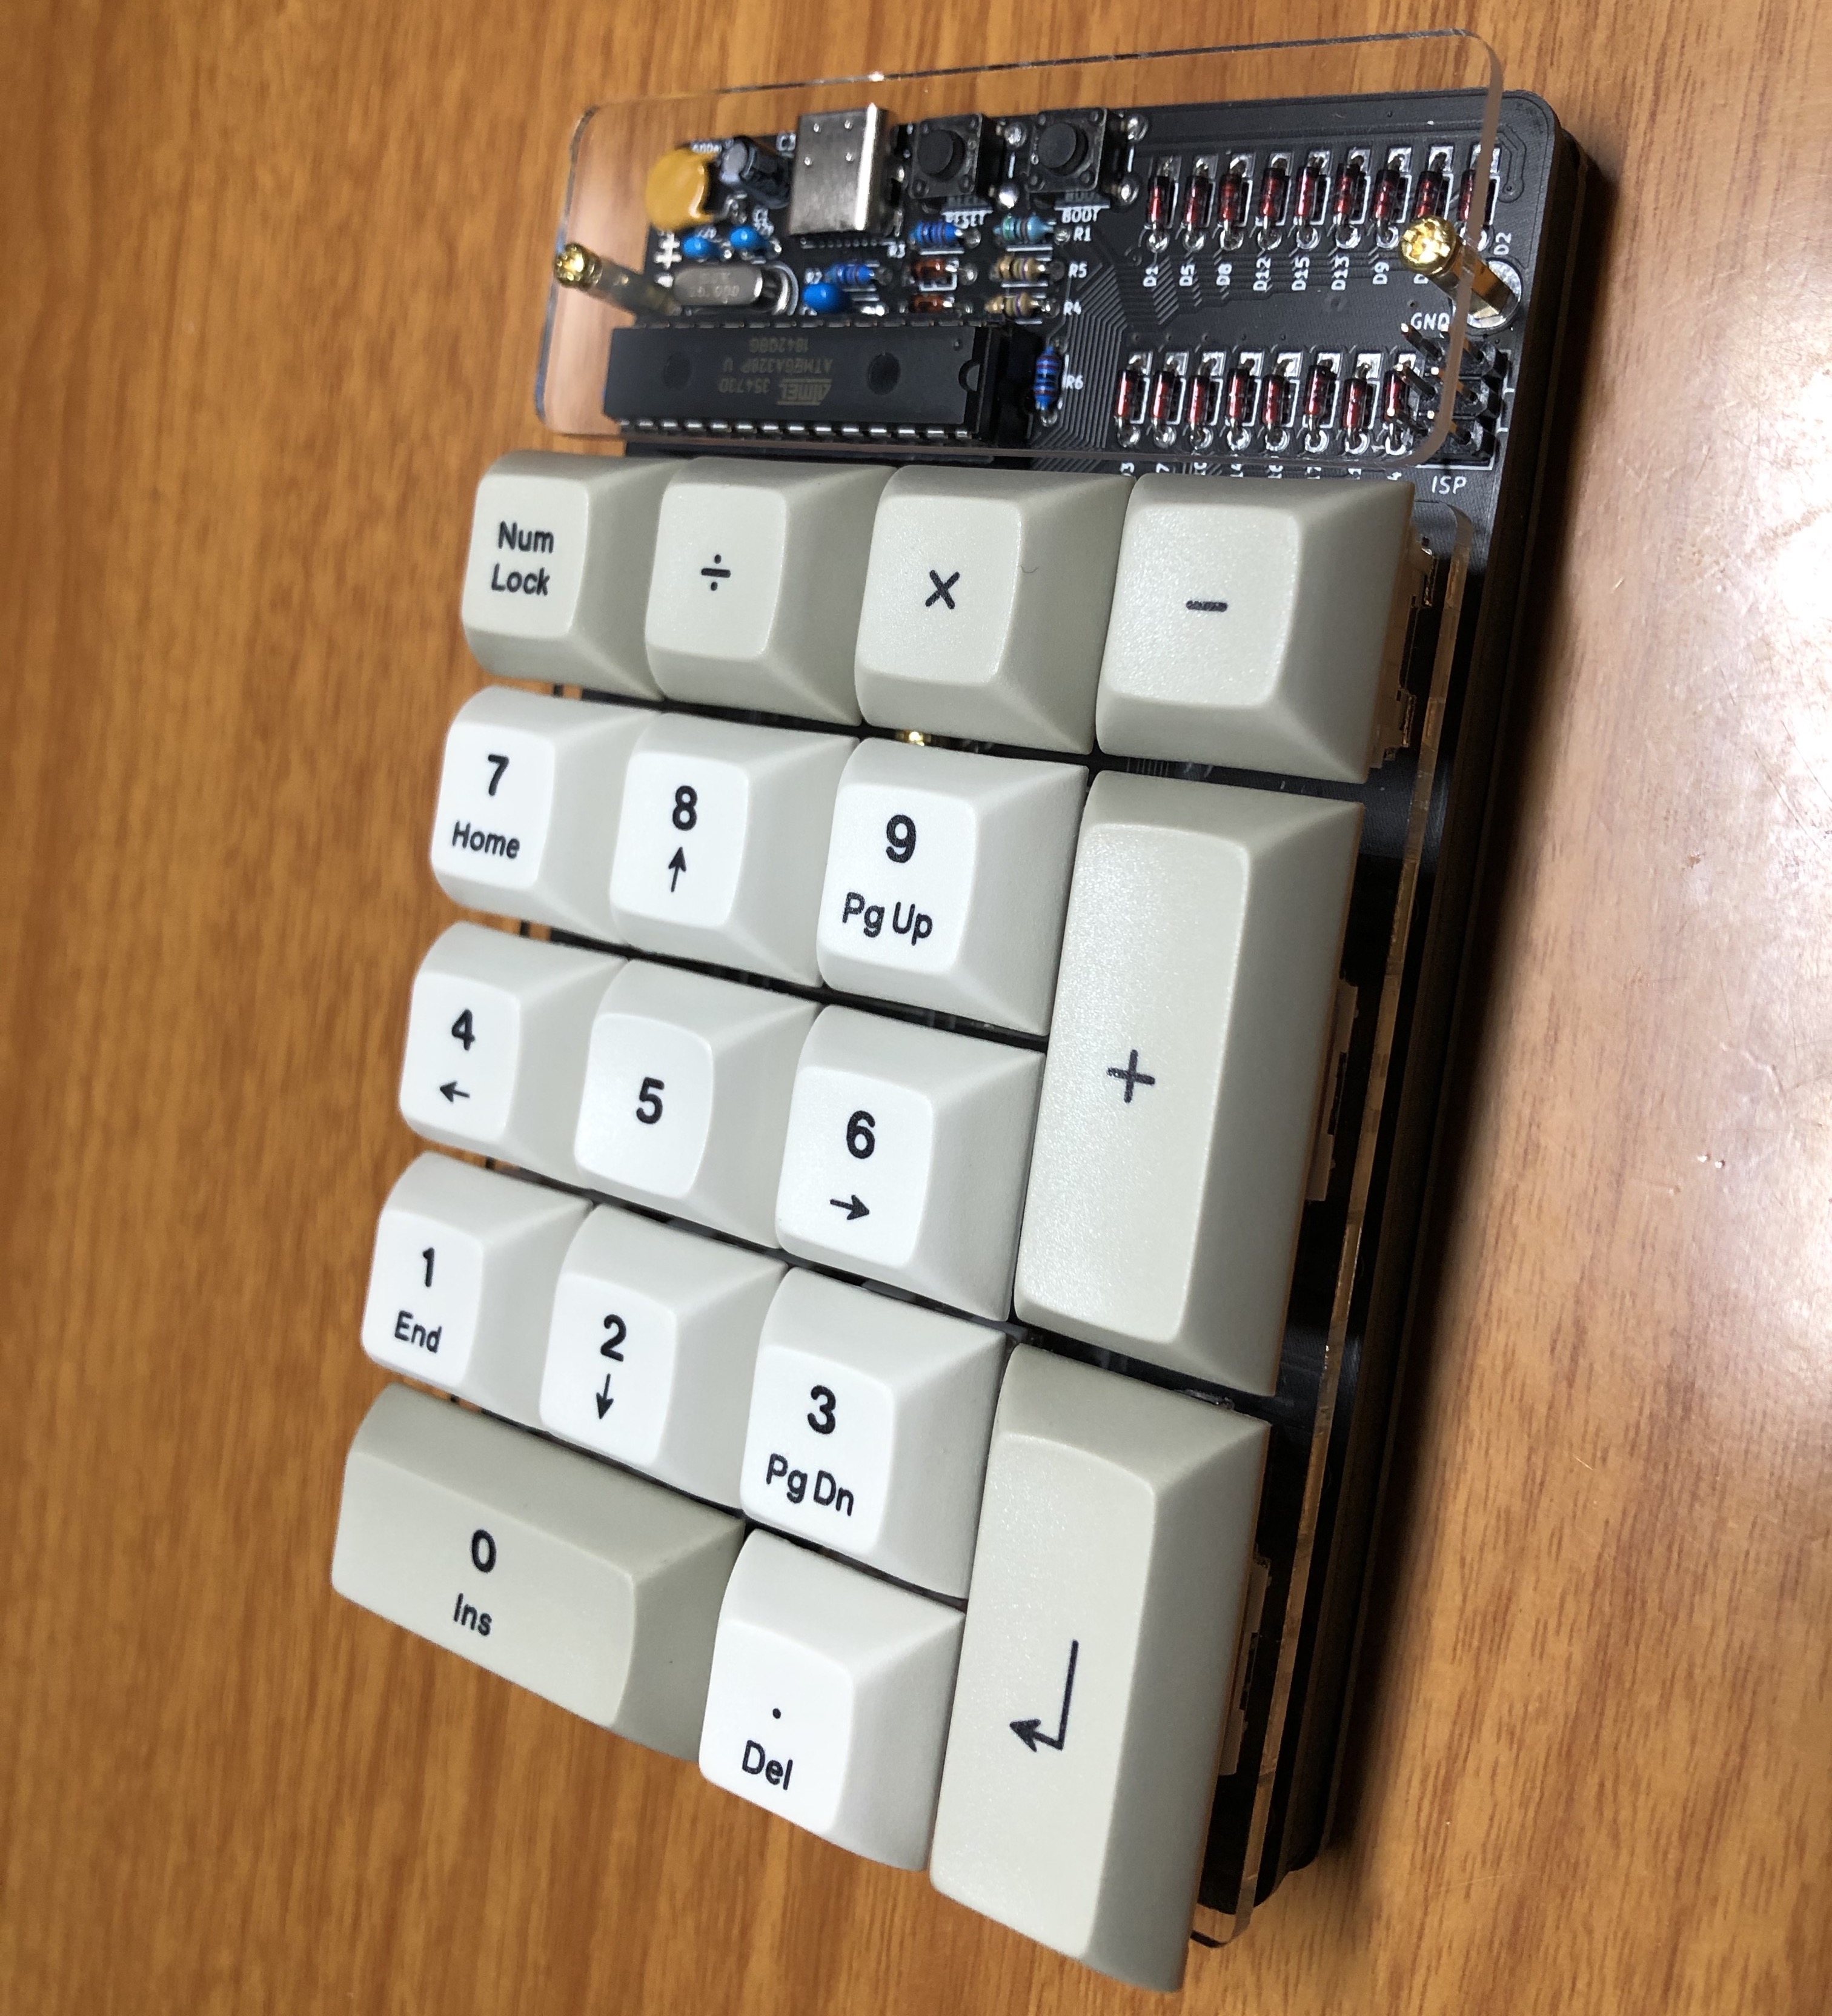
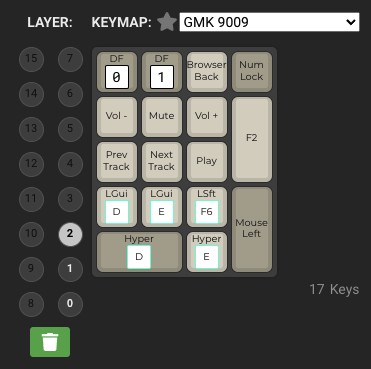
Before I get too deep into the details, here's a look at what I built:
Parts Selection
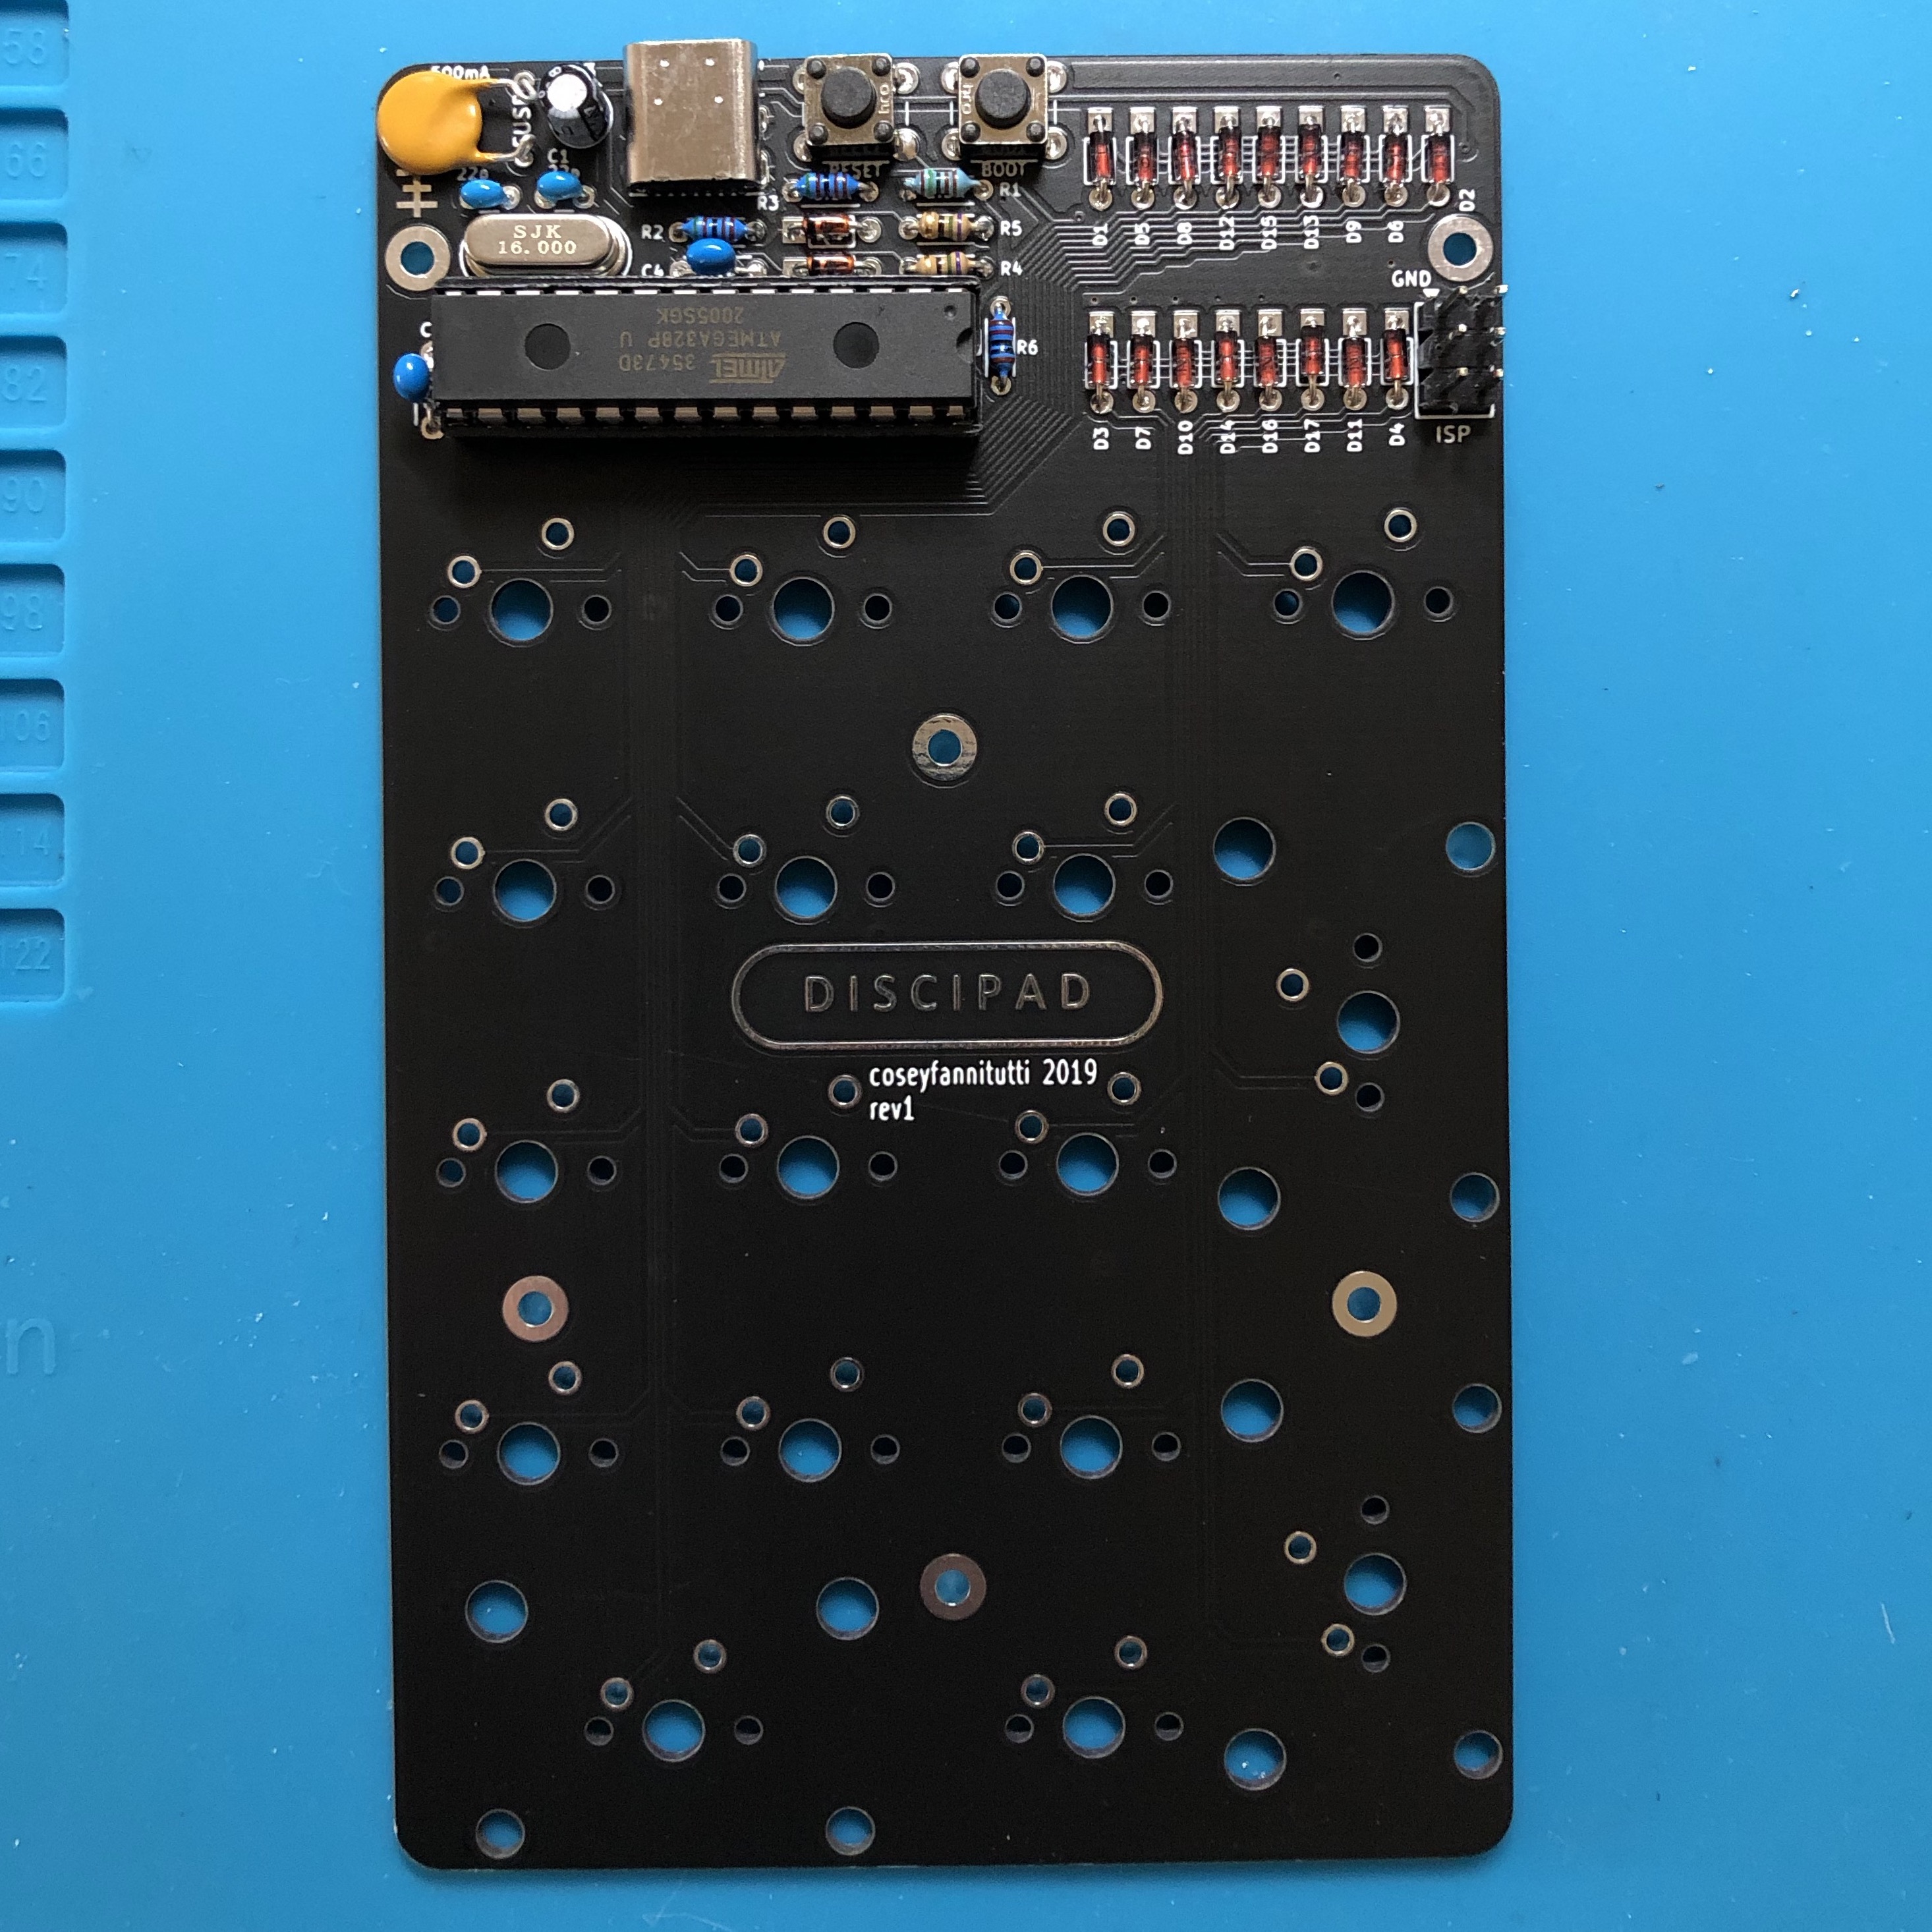
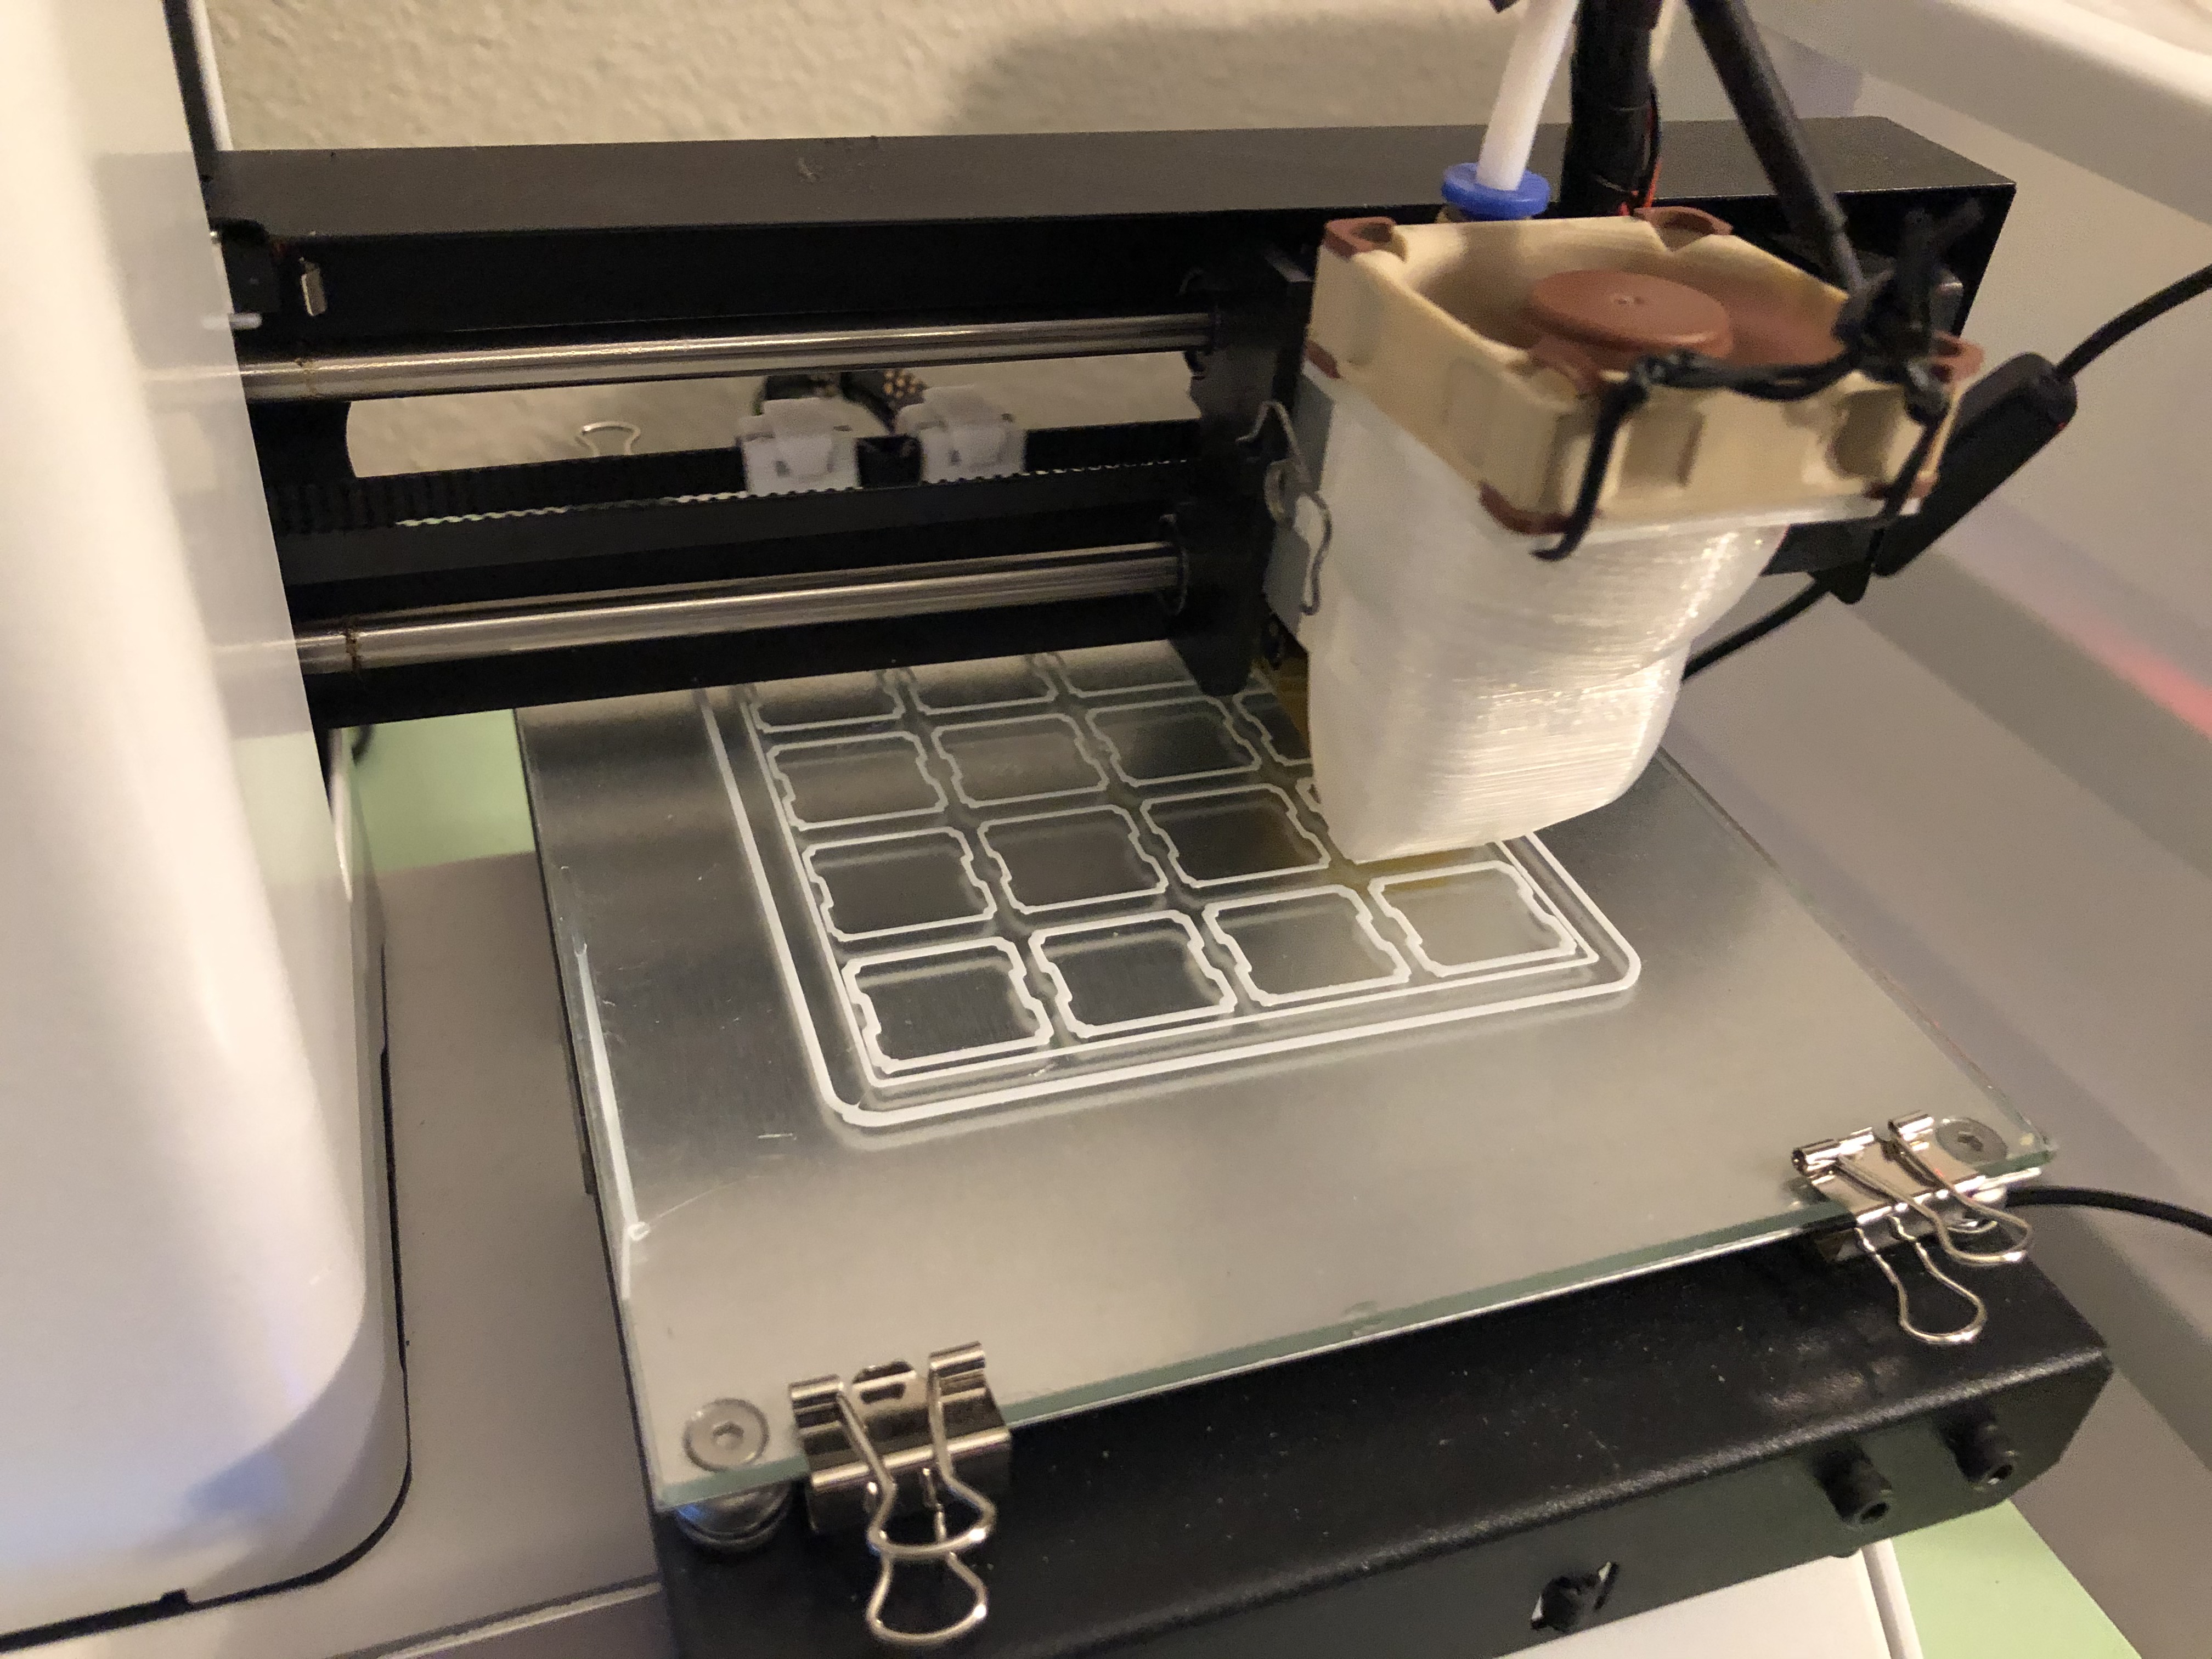
For the actual keyboard I decided to build what's called the Discipad. It is a 17-key wired numpad with USB Type-C and is programmable with custom firmware (more on that later). It also lets you solder all of the individual components to the PCB instead of just soldering a single controller board, so I effectively got to build my own Arduino on top of it all! Since I didn't want to source all of the parts individually (takes time, sometimes you have to order more than what you need, and more tedious), I bought a kit from someone off of the subreddit r/mechmarket.
Probably the most important choice for any keyboard build is what switches to use. For this build, I wanted to try out linear switches since my daily driver keyboard uses Gateron Brown switches that have a tactile bump to them. I ended up selecting Kailh Box Reds for my build, which are a well-built, linear, and water-resistant (not that I really needed it...) switch that require a medium-to-low amount of force to press.
Finally, for keycaps I had recently bought a new set of DSA 9009 caps for my Keychron K2. Since I use a 75% keyboard, that left the number pad keys plus several other keycaps from the set unused, which was perfect for my project!
Assembly
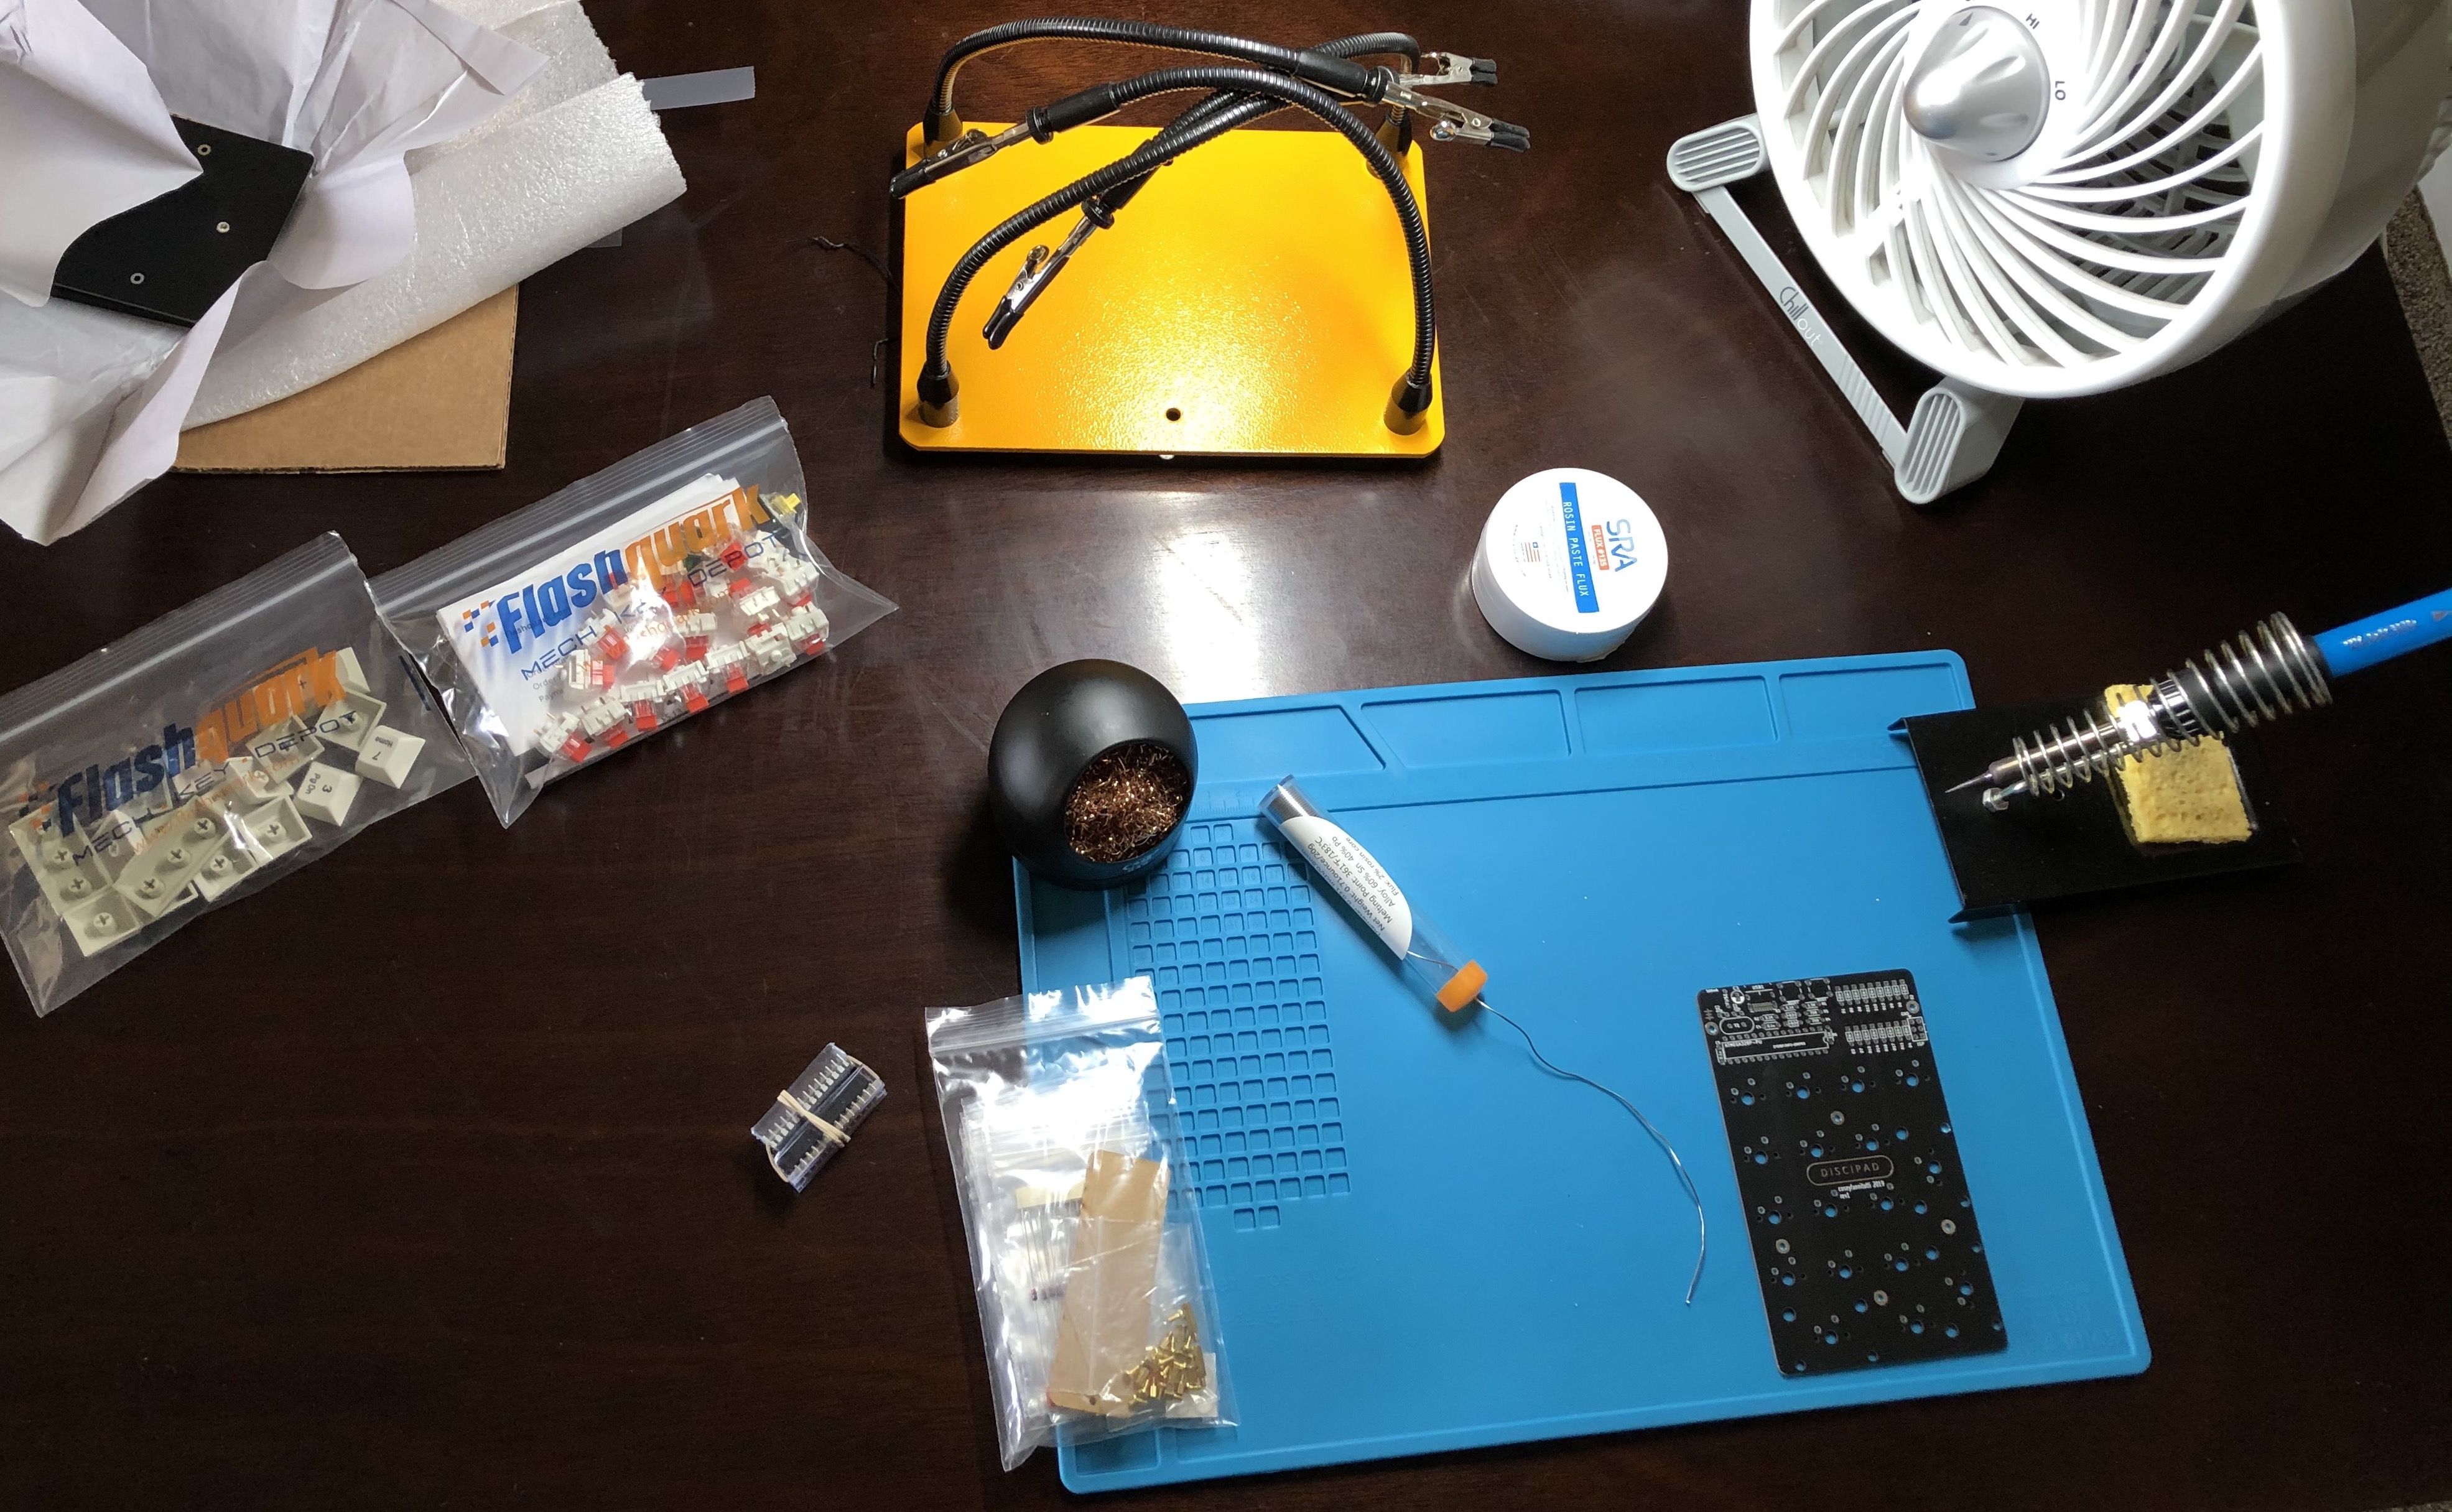
Materials in hand, I began soldering all of the components to the PCB. Luckily all of the components were through-hole and therefore easy to attach. The trickiest component was the USB-C connector which required liberal usage of flux to make sure the tiny data & power pins were soldered properly. The microcontroller also is seated in an adapter that makes it "easy" to pop it in and out. It's a pretty snug fit so I felt like I was going to break something, but it worked out 😁
Preparing the switches
Part of building a mechanical keyboard can involve going the extra mile and lubricating all of your switches and certain other components so that they feel as smooth and quiet as possible. As I mentioned above, I selected linear switches which can easily benefit from this extra step.
I will say, the process is a bit tedious but once you get the rhythm going you can turn on an audiobook and power through. It involves disassembling each tiny switch, then using a tiny brush to apply some lubricant (in my case I used the popular Krytox 205g0) to every part of the switch that might see friction. Mostly this includes the guides that help the stem move evenly up and down, and also a little bit on the springs so that they don't "ping" inside the housing. The rule of thumb is "less is more" so it's a slow, precise process.
You can also do the same on the stabilizers (pieces of plastic and metal that help keep the longer/larger keys stable when pressing them). This again involved adding Krytox to high-friction areas and also trimming some unnecessary parts off them. Spending a bit of extra time on this made a big difference in terms of sound and stability, since stabilizers tend to be more of a loose fit and can "rattle" a bit. I followed this excellent guide by Taeha Types to enhance the stabilizers.
Finally, it was time to solder on the switches and finish putting everything together:

Firmware
At this point the numpad was technically done; I plugged in the keyboard and everything worked like a numpad. However, I'm not an accountant and don't live and die by having a number pad, so part of my whole reasoning in building this was so I could upload custom firmware to customize the functionality of each key!
To start, I began building my ideal firmware with the excellent online tool QMK Configurator. It even had a preset for the discipad to work with! My first change was to override the Num Lock key since I don't use it often. I changed it instead to a layer switcher button, so when I press it each key instantly does something different. And if I press Num Lock again, it goes back to the default. My most-used shortcut is the one that I have configured to toggle my microphone and video during zoom/hangouts/discord meetings!
However, right after defining my mappings I immediately started running into issues. I downloaded my new firmware from QMK Configurator but for the life of me I couldn't get it to flash onto my newly constructed discipad. For whatever reason it just didn't want to enter the mode that allowed me to upload new firmware.
I could have stopped there, but adding my own custom firmware was part of the whole reason I wanted to build it in the first place. So I decided to go nuclear and bought this pack of USBASP ISP Downloaders. This was all pretty new to me, but basically since my board wouldn't accept new firmware over USB, I used one of these boards to flash the new firmware directly to the microcontroller itself.
It worked great except the first board had issues of its own and also didn't want to push the firmware 😔 Luckily, I had enough gumption to try it with the other board before totally giving up. With that, I finally had a working numpad with my own custom firmware!
Conclusion
Was it all worth it? I'd say so.
For one, I really wanted to try out linear switches, and I decided that I like them more than the tactile switches on my Keychron. I also was able to see if I could notice if a lubricated switch feels nicer than its default counterpart, and I think it definitely made a difference and was worthwhile. The tune-ups to the stabilizers were an especially notable improvement in terms of how solid and smooth the keys feel to press.
Ultimately it was a fun experience and project despite all the hiccups, and that for me is always worth it.
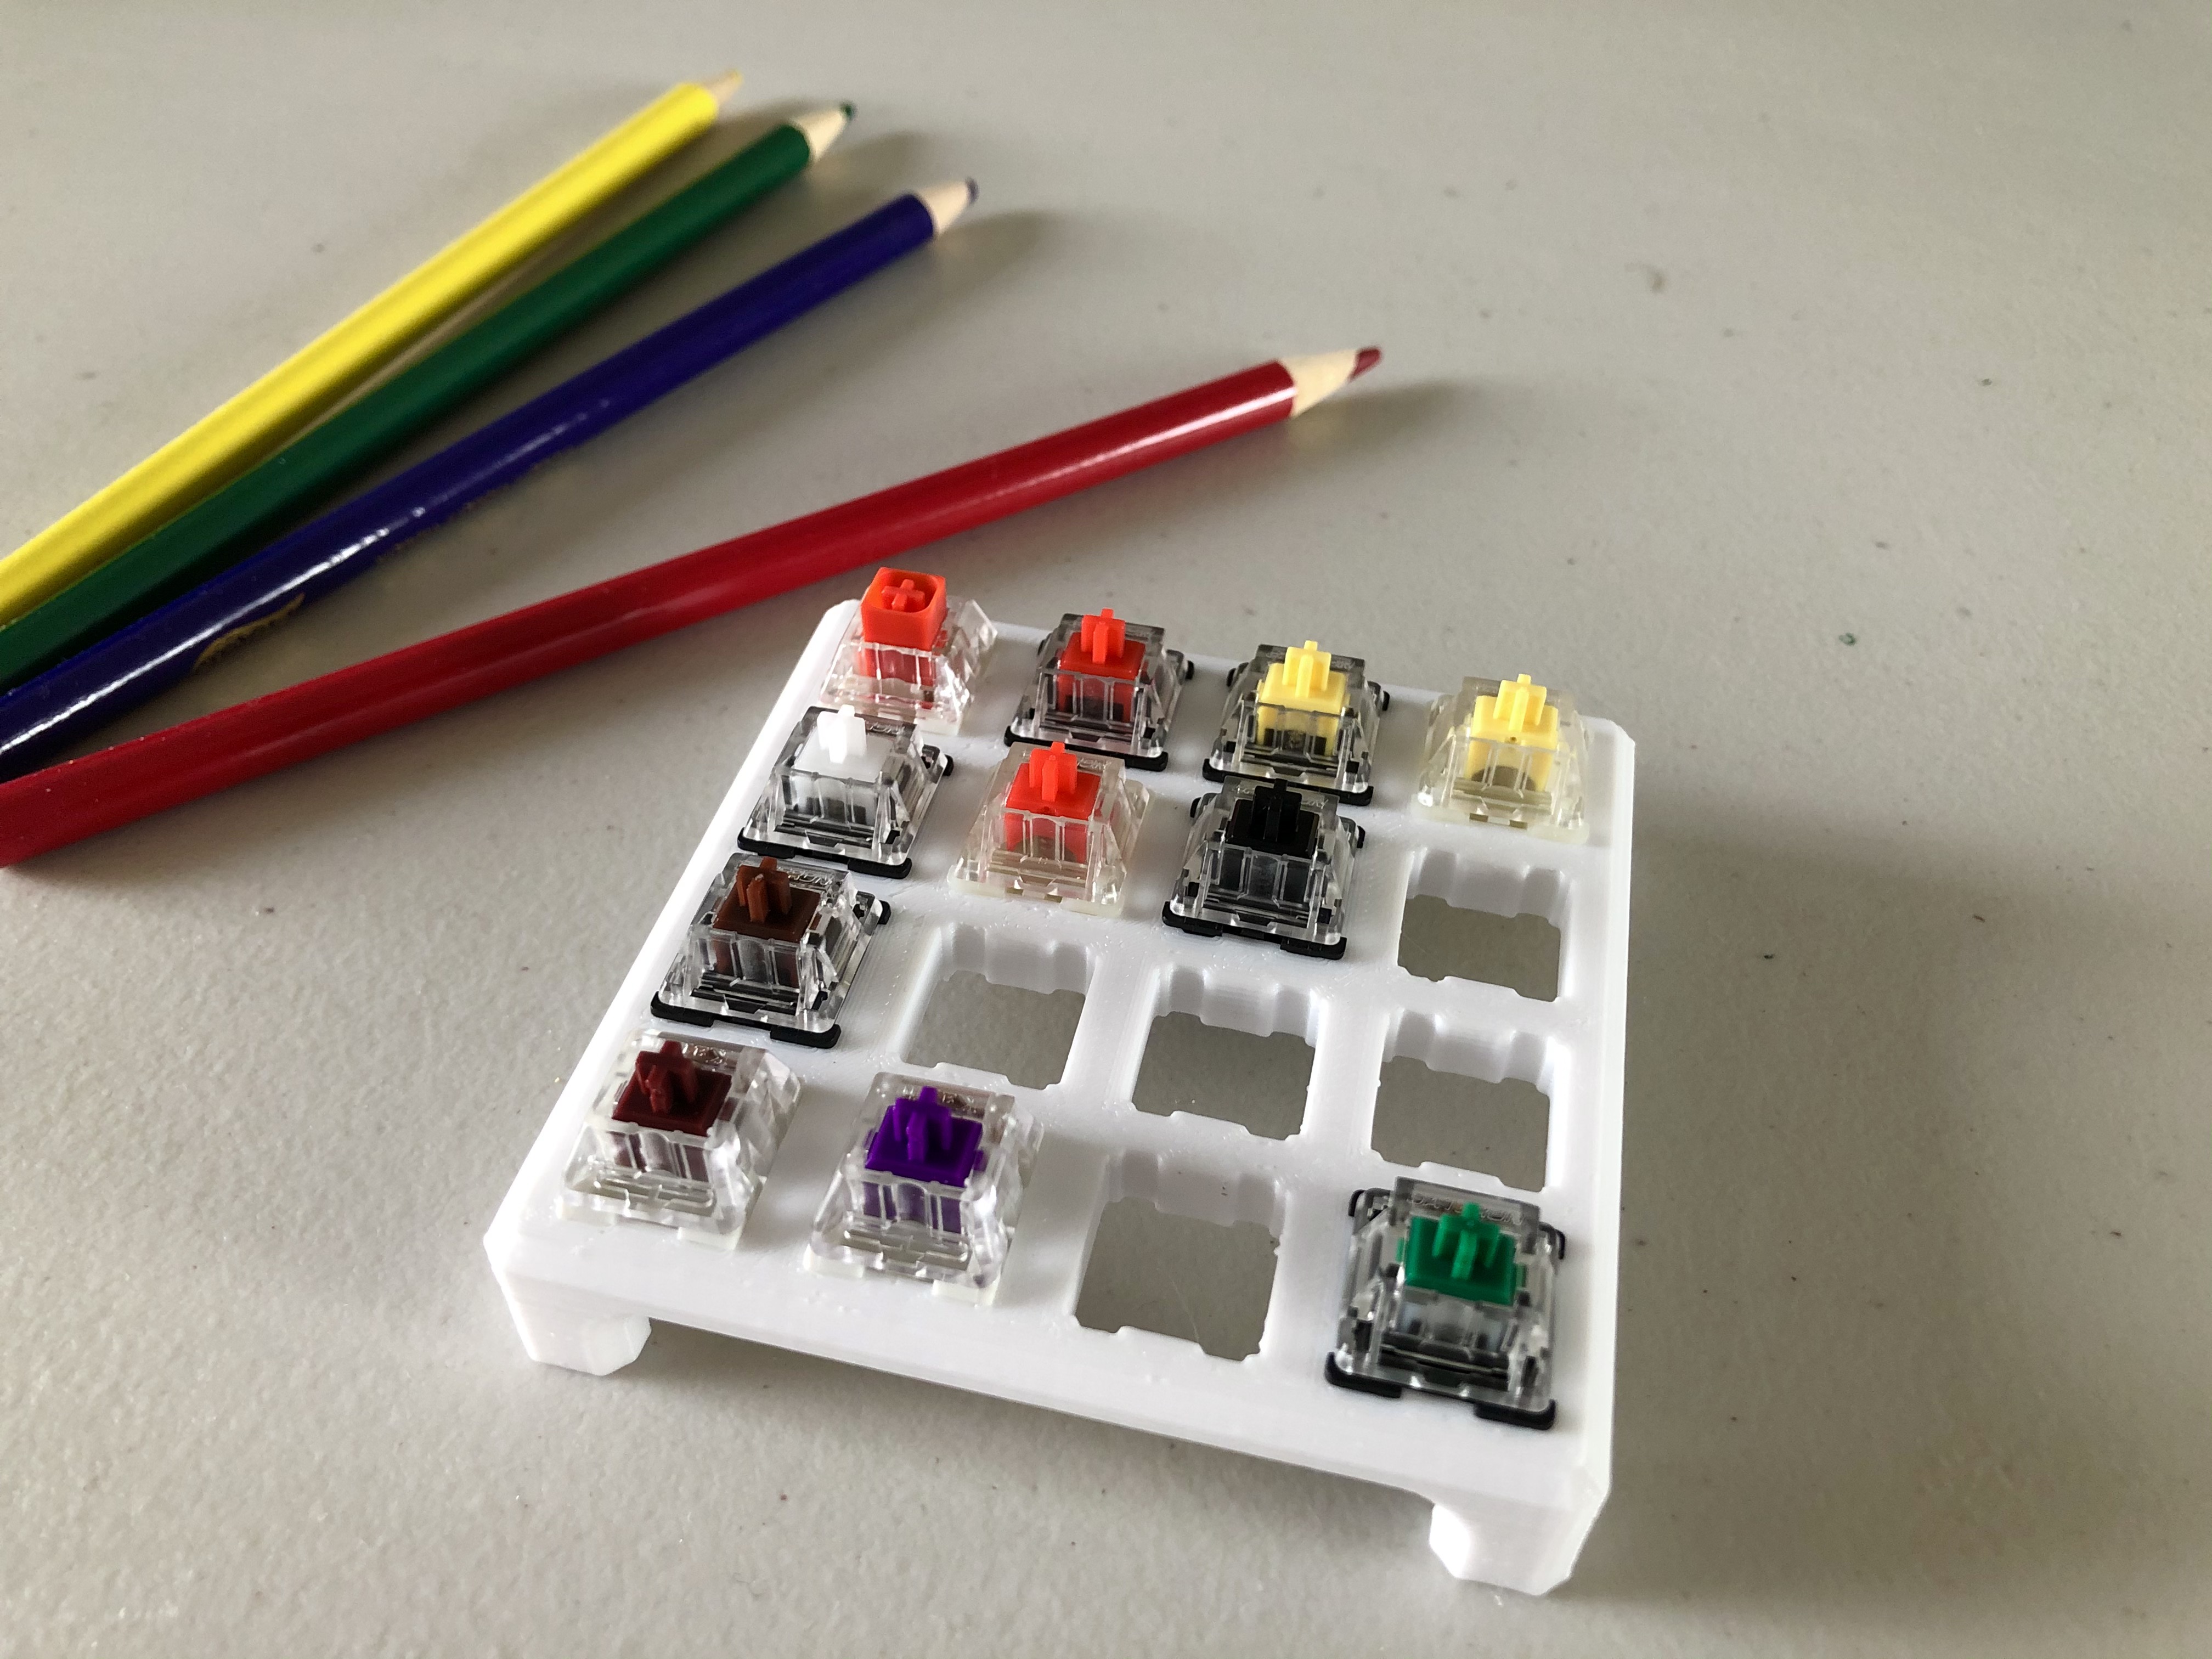
Bonus: building a switch tester
When I ordered my switches, I had to pay shipping anyway so I figured I'd buy a small selection of other types of switches to try out. Since I didn't have a project in mind for them, I decided to make a small 3D printed switch tester!
If you're curious, the STL files can be found on Thingiverse.
Thanks for reading!